Showing posts with label scenery. Show all posts

Friday, 7 February 2014

Warhammer Scenery - Ruined Buildings

As well as painting our Battle Board, we have also recently painted up our selection of Games Workshop terrain pieces. We had one each of the Basilica Administratum, Manufactorum, Sanctum Imperialis and Shrine of the Aquila sets, and had built them pretty much to the template on the front of the box. We'd not painted them for ages, due to not really being able to settle on a colour scheme! Well, fuelled by our success with the board, we decided to get a move on and sort out the buildings, and agreed on an approach to take.

The Basilica Adminstratum
After the seemingly endless job of cleaning off all the mould lines, everything was undercoated in black. The walls were drybrushed quite heavily with a succession of greys (Charadon Granite, Adeptus Battlegrey, Fenris Grey and Astronomicon Grey). All of the gold detailing is done with Vallejo Liquid Gold in Old Gold. Much better coverage than trying to use Citadel metallic paint! All of the skull details on the outside were drybrushed again with Astronomicon Grey.

The Shrine of the Aquila

The floors were painted in one of two ways. The plain metal grate tiles were heavily drybrushed with Macharius Solar Orange, followed by Boltgun Metal, to give us a lovely rusted look. The checked tiles we painted with Mechrite Red and Dheneb Stone. We thought we'd have to do more to it than that, but the finished look with just the basecoat is exactly what we were after! Dheneb Stone was also used to paint the scrolls on the front of the Sanctum Imperialis.

The Sanctum Imperialis

There's still a fair bit of detail unpainted, but for now they are more than good enough for us to use on our painted board. At some point we'll go back over them and pick out all the little details, like the lights inside and out.

Will share the Manufactorum when it is closer to being finished, for now it just has a basic rusty metal thing going on, but none of the details are done yet!

Thursday, 30 January 2014

Warhammer Scenery - Realm of Battle Board

As any hardened war gamer will know, when you first start out with this hobby you're happy to just roll out a mat to play on, and use empty tissue boxes as hills to make it interesting. Then, as you get deeper into it, investing a lot of time and effort and money into your army, spending hours and hours painting your models to get them just right, you realise you ought to be investing a little bit more time in your terrain.

Such was the case in our house. The only real investment we made in our gaming board in the early days was a 6' x 4' sheet of MDF (cut neatly into two halves for ease of storage) and the old Games Workshop battlemat. Not long after, we bought a couple of the hills and some trees. That lasted us for a good few years, but once we'd switched our focus from Warhammer Fantasy Battle across to Warhammer 40k, we decided the lush green battlefield we had didn't really cut it for the gritty battlefields of the 41st millenium!

It was about the same sort of time that Games Workshop brought out the Realm of Battle board, so after much debate, we eventually invested in one. It was left unpainted for quite a while, as we couldn't decide how to do it. Plus, a lot of our models were unpainted as well, so it didn't seem out of place to be playing on an unpainted board. More recently, however, we've found ourselves able to field almost full armies of painted models, and the unpainted scenery was starting to jar a little. So back in October we decided to start painting it.

We spent ages online looking at the various different ways people had painted theirs. We eventually decided on a brown colour scheme, a sort of desert(ish) wasteland theme. We did the base layers, but then it sat half painted for a couple of months while we figured out how to finish it off. A couple of weeks ago, we sat down in front of the telly and got out the paints again, and after several hours of endless drybrushing, it is now almost complete.


It makes such a difference having it properly painted. It's not quite finished, as we still need to varnish it and finish off the skull pits with water effects. So it's currently living on the dining room table, as we can't put it away until we've protected the paint job.


It was a bit of trial and error to get the colour scheme to work, but here's a run down of how we did it in the end.

1. We basecoated the entire board with black paint (we used a spray can of black we bought in Wickes, as it was slightly cheaper than the Games Workshop Chaos Black spray), and then sprayed the whole thing brown, leaving the exposed rock edges black. The brown spray we used was from Halfords, their own brand Camouflage Spray Paint in Brown - ultra matt. Lovely coverage - we used about one and a half cans for the whole board.

2. The rock sections were all painted with Adeptus Battlegrey from the Citadel foundation paint set.

3. Rock sections drybrushed with Astronomicon Grey from the Citadel foundation paint set.

4. The brown areas of the board were drybrushed with yellow acrylic paint. Rather than use up the expensive-in-large-quantities Citadel paints, we bought a tube of Galeria acrylic paint from Hobbycraft in the colour Yellow Ochre. Using 1" flat brushes, we managed to do all six panels in less than the running time of Man of Steel. The skulls in the pits were heavily drybrushed with Bleached Bone Citadel paint, then two layers of Thraka Green Citadel wash was applied. We still need to go back over them and drybrush the very top edges with Bleached Bone, before filling the pits with Woodland Scenics Realistic Water.

5. The skulls and bones found in piles around the rocks on the board were painted with Bleached Bone, and then washed with Agrax Earthshade Citadel wash.

The craters (set from Games Workshop) were painted to match the battleboard. Undercoated in black, sprayed with the same brown spray and then heavily drybrushed with the yellow ochre. To define them a little more, we chose prominent sections of the crater edges and drybrushed them as rocks, using the same combination of grey paints as above. We then went over them with Scorched Brown Citadel paint, drybrushing inside the craters to darken down the interior of the crater.


To properly see how it looked, we set up a mock battle on the board using only fully painted models. It's a bit one sided, as we have painted far more Chaos Space Marines than we have Imperial Fists!


I still have a fair few bits of scenery work to do; I've got some homemade pieces that haven't been painted yet, and I need to sort out the bases for my Imperial Fists and that second Heldrake. The buildings already on the board in the shot above are not quite finished either, lots of little frustrating details to do, but I will share progress on those so far in another post.

Tuesday, 23 October 2012

Warhammer Scenery - Rocky Bases

I've not really done much crafting outside of knitting and crocheting for some time now. Not really living up to my self proclaimed title of Master of a Thousand Things! But this past week or two, I've been focusing on a different sort of crafting - making bases and scenery for Jamie's Warhammer 40k models and games. I've been sharing pics of my progress on Instagram (you can find me there as supertinks), but thought I'd share the work here too, as I am quite proud of what I've achieved!

I started out with something simple - bases. Jamie's been on a real drive to finish off his Chaos Space Marine army, but none of the models bases had been painted. This is because Jamie lets me do that, and I hadn't been in the mood for some time. With the army nearing completion, I thought I'd better get started.

Chaos Lord
Taking inspiration from the Chaos Lord model, who comes with a moulded rocky base, we decided to go for a simple rock and sand look, using static grass to artistic effect on each finished base. Having recently got my hands on some proper basing materials, we decided to make suitably impressive bases for the other character models and large models in the army.

Typhus (image from Games Workshop)

Jamie bought the above Typhus model recently, and I thought I'd start with that. The model is an old sculpt, so it's not particularly dynamic. It comes with a plain base, so I took some thin cork sheeting and made him a little rocky platform.


I had to be careful to keep both sides of the platform level, as he's designed to sit flat on the base.


I just tore the cork sheeting into appropriate sizes, and glued it down with a hot glue gun. The stones were added afterwards, using the hot glue gun for the larger ones, and PVA glue for the sand.

Spurred on by the relative ease of building that base, I got out the Helbrute model from the Dark Vengeance box set.

Image from Games Workshop

Another model designed to sit flat on a plain base, although this one is more dynamically posed and has a stone underneath one foot. Whatever I did had to incorporate that stone.


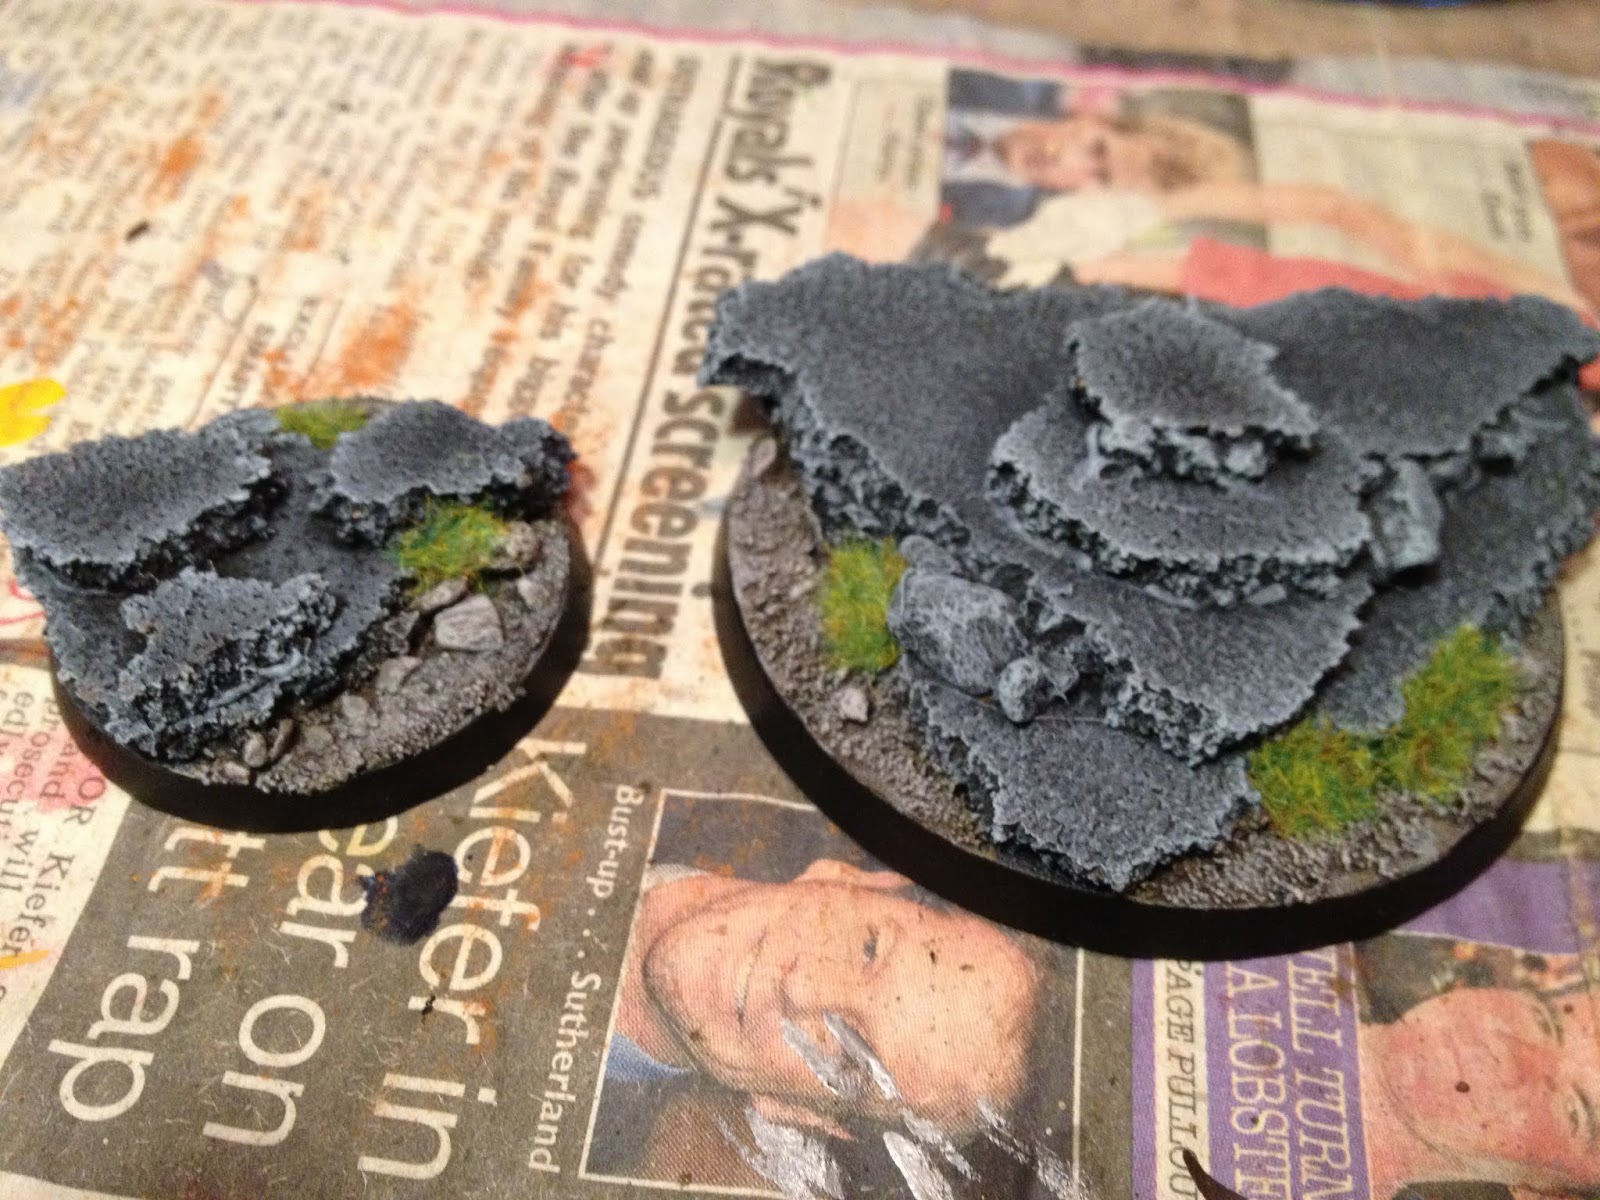
I used the same principles, tearing up cork sheet to build my rock, before adorning the gaps with stones of varying size and gluing sand to the remaining exposed base. The cork was shaped to fit the large feet of the model.

Painting the bases was easy. I just used the same colours I used on the pre-made base above. They were undercoated with the Games Workshop Chaos Black spray, then a heavy drybrush of Adeptus Battlegrey from the Citadel foundation paint range.


After that dried, I highlighted the rock with a drybrush of Astronomican Grey (also from the foundation paint range).


Once that was dry, I turned my attention to the sand. This is the most ridiculous part of painting Games Workshop bases, as you stick perfectly reasonable sand onto the base, then paint it to look more like sand. If you don't paint it, it doesn't look real compared to the rest of the model!

The sand is first painted with Khemri Brown (foundation paint).


Then, a wash of Devlan Mud (from the Citadel Wash range).


Once the wash was completely dry, I drybrushed the sand with Dheneb Stone (another foundation paint). When I was done drybrushing, I took some Chaos Black (from the Citadel paint range) and painted the edge of the base.


The final touch is to glue on some static grass in strategic places. I use the grass to hide particularly poor areas of the base, so gaps in the sand material on the base itself, or embarrassing looking areas of the cork, for example where there is a splodge of glue showing.


And here are the finished bases with their (still unpainted) models balanced on top:


I am particularly pleased with the way the helbrute sits on his base. Once Jamie has painted the model, and the rock under his left foot has been painted to match the base, it will look seamless.

In order to attach the models to the base when they are done, we will drill into their feet and insert metal pins, which will push easily into the cork and provide a more stable attachment than simply gluing them down.

Following the success of these bases, I have turned my attention to more exciting bases, such as the bases for the flying models, and building proper battlefield scenery pieces. These are still works in progress, but I will be back with step by step guides to how I put those together once they are done!
Related Posts Plugin for WordPress, Blogger...