Wednesday, 28 November 2012

Colourful WIPs


A colourful Wednesday update from me today. I've really been bitten by the stranded colourwork bug!

Last week I showed you the start of Peerie Flooers. Well, my replacement needle arrived at the weekend, and once I'd transferred the stitches from one to the other I was able to carry on knitting.


I have to say, I love my new Addi Premium needles. They are so much better than the cheap bamboo-and-plastic cable needles I've been buying up until this point. It's a slippery slope though, because now I know that next time I need to buy a new needle, I'll be ordering these slightly more expensive ones instead!

As you can see in the pic, I've finished the first full chart of flowers. I've actually knit a few more rows since I took this. It's so simple, really, as the chart is so narrow the pattern repeat is easy to memorise in each row. I'm slowly getting the hang of this colourwork lark as well.

In fact, I'm enjoying it so much I cast on a second colourwork project while Peerie Flooers was in time out.


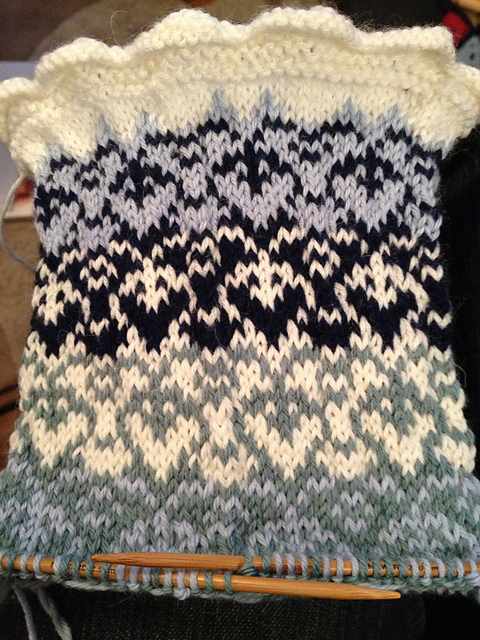
This is knit in DK weight, with far fewer stitches on the needles, so it's progressing much faster than the hat. It's Mimi's Cool Stocking, featured in the Simply Knitting Christmas knits supplement. I didn't use the recommended yarn, as Debbie Bliss Cashmerino would have broken the bank a little. Instead I'm using Patons Diploma Gold, as there was 15% off all Patons yarn at Deramores when I was looking! It took me ages to choose the colours, I tried to get as close to the originals as I could. The navy looks quite black in the photo above, but I assure you it is blue.

I'm finding it harder to keep the correct tension doing stranded colourwork on dpns, but I'm getting there. Again, like Peerie Flooers, the chart is narrow, so it's easy to remember. Although for some reason I am more distracted when knitting this, and keep making mistakes!

Tuesday, 27 November 2012

Pretend to be a designer!

Every knitter reaches the stage in their knitting career when they get fed up of just following patterns, and want to branch out into writing their own. While I have been perfectly at ease doing this with crochet (and have four original designs available for free here on the blog), knitting is a bit trickier because it's altogether more technical than crochet.

However, there exists a handy halfway step between simply following a pattern and whipping up something completely original - modifying an existing pattern. This is something I am beginning to master when it comes to fingerless gloves, having knit four pairs of gloves from the same basic pattern and ending up with four completely different and unique pairs of gloves!

The pattern is the Easy Half Mitten by Michelle Porter (a free Ravelry download).


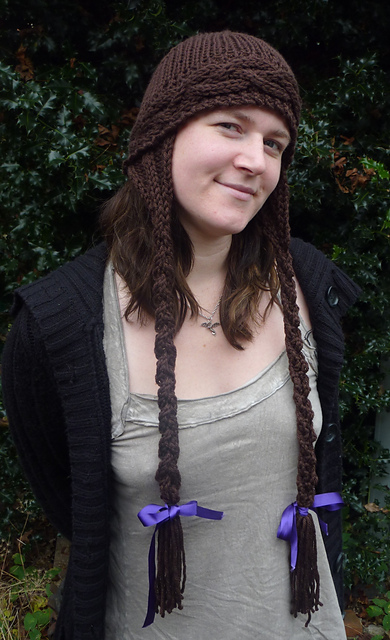
I confess, I have yet to knit a pair that looks exactly as the pattern dictates. The very first time I knit these gloves was to make a matching pair for my Free Rapunzel hat:


I wanted a plain and simple mitt pattern that I could modify to incorporate the braided cable from the band of the hat.


There was a lot of scribbling and calculating involved before I actually cast on. The mitts are knit over 32 stitches, which means when you divide them across the dpns, you get 10 stitches on two of the needles and 12 on the third. I kept the 12 stitches on the middle needle, as these are the stitches that go across the back of your hand. This is where I was going to add my cables. I simply replaced all of the plain knit stitches on that needle with the chart from the free rapunzel pattern.


The other critical thing to remember about modifying plain mitt patterns is that once you start adding a design, your thumb has to move. On the left mitt, the thumb is as the pattern dictates, on the first needle in the round. But on the right mitt, you need to reverse the directions and knit the thumb on the third needle in the round. In the case of this pattern, that meant reversing the instructions so that when I got to the thumb part, instead of knitting 3 stitches then starting my thumb increases, I knit to the last four stitches and then started the thumb.

I also found the pattern didn't make the gloves long enough (maybe I have extra long hands?) so I added extra plain knit rows before and after the thumb gusset to make sure the cuffs sat comfortably over my wrist and knuckles.

Emboldened by my success in modifying this pattern, I offered to knit Jamie a pair.


He asked for warm, black fingerless gloves to wear when LRPing. I had just finished a pair of fingered fingerless gloves so understood the principles behind knitting proper fingers and thumbs on gloves. So once again I pulled out this easy mitt pattern, and adapted it to my needs. As Jamie has bigger hands than me, I cast on 36 stitches instead of 32, and used slightly bigger needles than I had the first time (5mm, as opposed to 4.5mm). I knit the gloves pretty much as per the pattern initially (although I did add an extra plain knit round before the thumb increases). But instead of binding off the thumb stitches where told, I just transferred them to waste yarn and continued following the pattern for the hand.

I then did some crazy maths to work out how to divide my 36 stitches evenly across four fingers. Looking at my hastily scribbled notes (another tip - make a note of everything you do that is different to the pattern, especially if you're making something that comes in a pair and you want them to look the same!) I took 9 stitches for the pinkie and cast on one across the gap, making 10 stitches. As I had done on the leafy fingerless mitts, I then returned all 27 of the remaining live stitches to my needles, picked up a stitch where I'd cast on across the gap and knit 3 more rounds (look at your hands, your pinkie starts below the rest of your fingers). I now had 28 live stitches, from which I needed three more fingers.

Ring finger took 9 of those stitches, plus two cast on across the gap. Middle finger then used another 4 stitches from each side of the glove, two stitches picked up from the ring finger and cast on one across teh gap to make 12 stitches. The index finger then used the remaining 11 stitches from the glove plus one picked up from the middle finger. All live stitches used, and four fingers knit. Each finger was 5 rounds long before binding off.

The thumb was knit in the same way, putting the 9 live stitches back on the needles and picking up three more stitches from the top of the thumb hole. 5 rounds of plain knit and I had a thumb to match.

Mitt number two was done in exactly the same way, no need to muck about moving the thumb gusset as these gloves are plain and therefore identical front and back.

I've done three pairs of gloves with fingers now, and I have to say I find it really irritating to knit them!


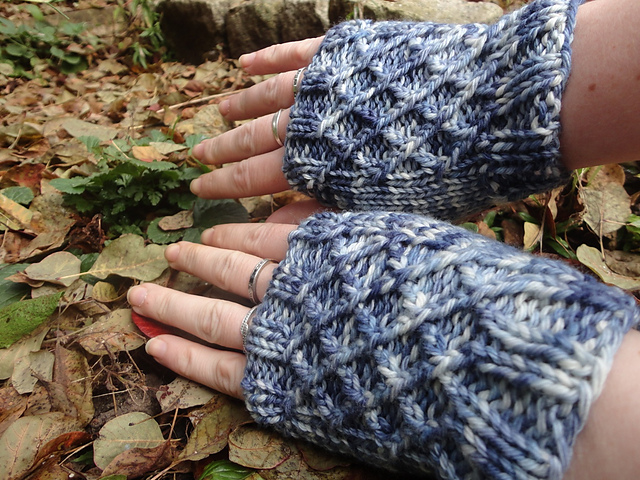
My third modification was essentially a return to the first. Instead of replacing the 12 stitches on the middle needle with the cable from one pattern, I used the cable pattern from Koolhaas which I'd knit from the same yarn. I couldn't find my notes I'd made for the Rapunzel mitts, so I reverse engineered my modifications by looking at the finished article and comparing to the pattern! This time, I was a bit more technical, and wrote out the entire pattern as a chart in Excel, because it was trickier to get this cable pattern to work. I think I did a shorter cuff this time, 8 rows instead of 10 in the rib, with 8 plain rows before starting the thumb gusset.

The yarn is lighter weight, but I used 5mm needles again. These gloves are slightly airier than the others, but just as warm and cosy!


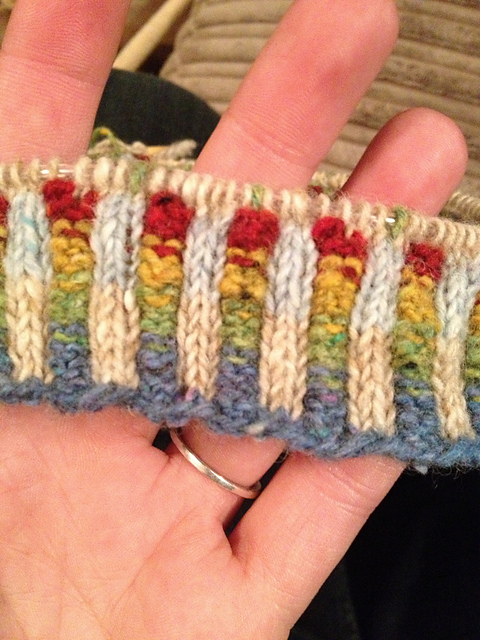
My fourth modification is probably (for me) the most advanced. I wanted to use up all of the chocolate coloured chunky Debbie Bliss Cashmerino I'd used for Rapunzel, and after several failed attempts I settled on another pair of these fabulous mitts. This time, I divided my yarn into two equal sized balls, did a provisional cast on and started with the plain knit rounds below the thumb, leaving the cuff till the end. I also took some of the mods from Jamie's gloves, and added a longer thumb. This time I chose to knit most of the thumb in 2x2 rib, so it would match the cuff across the fingers. Once the rest of the glove was knit, I picked up my provisional stitches and just knit 2x2 rib for the cuff until I ran out of yarn. I managed twelve rows on each cuff, which neatly matches the six rows on the cuff around the fingers and thumb.

I had less than a yard of yarn left, so they were definitely a success.

Monday, 26 November 2012

Snappy Happy Monday

The pile of ends once I'd finished weaving in everything
on the sofa bed afghan

New Addi Premium needles for Peerie Flooers

The other stranded colourwork project I started while I
waited for my new needles to arrive

Me in Cardiff on Saturday, preparing for the match

The view from our seats inside the Millenium Stadium

Gorgeous Christmas lights in Cardiff city centre

More beautful Christmas lights in Cardiff

Sunday, 25 November 2012

Year of Projects Update 25th November


This sofa bed afghan yarn is never ending! My third project using these leftovers is finished, and I still have 1,500 yards left across the four colours. So far, I've used the brown, cream and black in my YoP projects, so I still have a lot of purple to use.


My latest project uses Charcoal and Peat. I thought the double loop stitches would eat into my stash, but I still have nearly half a ball left!

Pattern: Sheep Toy by Deb Richey (free from Caron International)
Yarn: Stylecraft Special Aran with Wool in Peat and Charcoal
Hook: 4mm

Caron list this as an "intermediate" pattern and I can see why. The double loop stitch is tricky at first and even though I got the hang of it, it really hurt my fingers and I was glad to be done with it when I got to the head and legs!


The fabric you get from the double loop is even more rigid than you normally get in an amigurumi. It helps to create a really nice shape for the body of this sheep, which meant I didn't need to over stuff it.


Sewing the parts together was difficult. I am not the biggest fan of attaching amigurumi parts; I will often adjust patterns so I can avoid it where possible. In this case, it was even more irritating because I was having to sew through the thick layer of loop stitches to get at the fabric. The legs were particularly annoying because they had to be straight and even. At first they were a little splayed, but I did some tightening up under the body with my loose ends and now they sit a little better. Well enough for him to stand up, at any rate!

I've named him after our National Anthem, as it's Autumn International time in the rugby world and we were in Cardiff yesterday for Wales v New Zealand.

Wednesday, 21 November 2012

WIP: Peerie Flooers


Earlier this year, my wonderful friend EmmyLou gave me the seven balls of Rowan Fine Tweed you see above, along with the pattern for Peerie Flooers. She knew I wanted to have a go at colourwork and thought this would be the ideal starting point for me. As I still hadn't started it when the second Year of Projects rolled around, I added it to the list in the hope that would give me the kick up the bum to actually get started.


Sadly, disaster struck on Monday. I was merrily knitting my way through the next flower section of the chart, when I noticed my stitches getting stuck where the cable joins the needle. On closer inspection, I discovered the cable had broken and was tearing away! I quickly put it away, not wanting to lose all of my stitches at once, and jumped straight on the internet to find a replacement. No more cheapo bamboo needles with plastic cables from eBay for me! I have ordered myself an Addi Premium to replace it.

Tuesday, 20 November 2012

FO: Sofa Bed Afghan

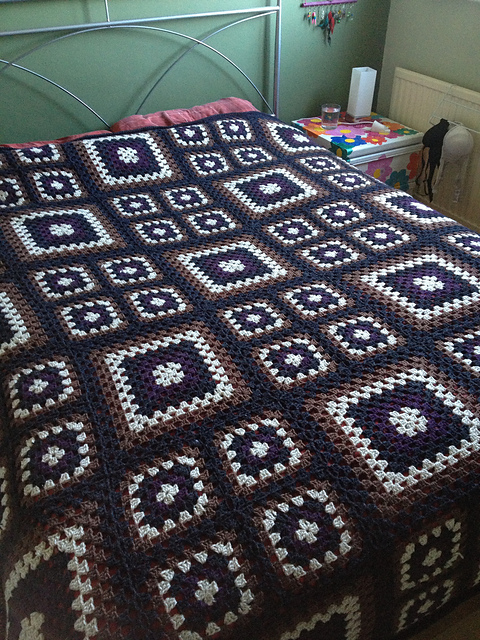
It's been six months in the making, but I am pleased to say that the sofa bed afghan is finally finished!


The actual crocheting part was done nearly two months ago; my Ravelry notes say I finished the border on the 29th September. It's taken me seven weeks to build up the enthusiasm to weave in all the ends I'd left untouched while joining!

Project: Sofa Bed Afghan
Pattern: Granny Square Afghan #LB20155 by Lion Brand (free from the Lion Brand website, but you have to register)
Yarn: Stylecraft Special Aran with Wool in Peat, Charcoal, Walnut and Blackberry
Hook: 6mm
Final Measurements: 160" x 88" (approx)

I supersized this blanket from the original design. The pattern as written gives you a blanket 39" x 52". This just wasn't going to be big enough for my sofa bed! Rather than making 6 large squares and 24 small squares, I did 15 large and 60 small. It was an epic challenge, but because it was done in small chunks, it didn't seem so bad. I also saved myself an enormous headache by leaving off the final round on every square, so I could use it to join-as-you-go, to avoid the nightmare that would have been sewing this blanket together. It also means the joins are far neater than I could have achieved otherwise, and far more secure.


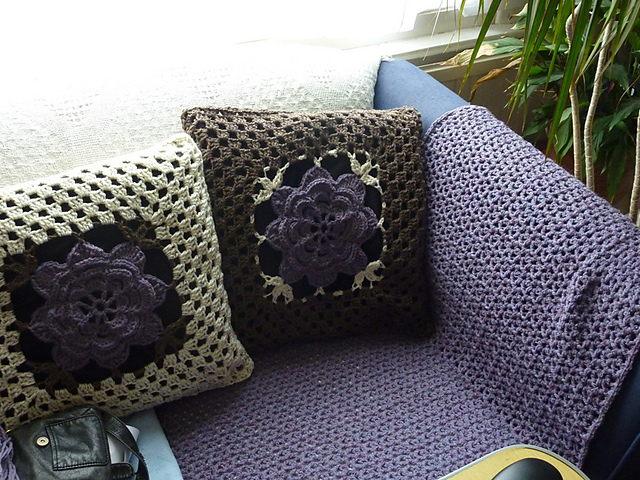
Colour choice was in part decided by the room in which the blanket will live. The pattern suggests cream, grey, black and green as the contrast colour, but as the spare room is brown, I knew I had to incorporate brown to make it work. I drew inspiration from the sofa cushions I crocheted two years ago...


...and chose purple as my accent colour. I already had the charcoal in my stash left over from my hooded cowl, which led me to decide on using Stylecraft Special Aran with Wool for this blanket. It's much heavier than my rectangular granny blanket, which was crocheted from 100% acrylic DK weight yarn. I've recorded on Ravelry the amounts I used for this one, and adding it up there is just over 2kg of yarn in the sofa bed afghan!

The spur to finally finish it off and get those ends woven in came at the weekend. I had the house to myself on Saturday night and stayed up ridiculously late. Of course, the heating had gone off hours before so the bedroom was a little chilly. I couldn't be bothered to go back downstairs to get Darwin; instead I snuck across the landing and stole the blanket from the spare room. I was so warm and snuggly! I'm also quite pleased that (as you can see from the first photo) in my desire to make the blanket big enough for the double mattress in the spare room, it's also just about big enough for our king size bed!

I have a ton of leftover yarn which has been added to my Year of Projects stash; in fact, I've already finished three projects with it and am now casting about for a fourth. I've already shared Terry and Darwin, and will be showing off the third on Sunday.

Sunday, 18 November 2012

Year of Projects Update 18th November


Another week, another finish! The idea of using up my stash seems to have led to lots of small, easily finished projects alongside my more longer term efforts. I blogged about these gloves on Thursday, picked up my needles to cast on the second mitt yesterday morning and an hour and a half later I had a pair! Not only another finish for the Year of Projects, but my first FO for the Show of Hands KAL.


Project: Kool Hands
Pattern: Easy half mitten by Michelle Porter
Yarn: Candy Skein Yummy Worsted in Blueberry Cheesecake
Needles: 5mm DPNs

I love this free mitt pattern. It's so easy to modify! This is the third pair I've made now, and all of them have been different. I didn't use up as much of my left over yarn as I'd hoped (I was being rather conservative, hence the very short cuffs) and have 15g of it still remaining! I can't think of anything to do with it now, so I'll just chuck it in the bag of very small leftovers and forget about it!

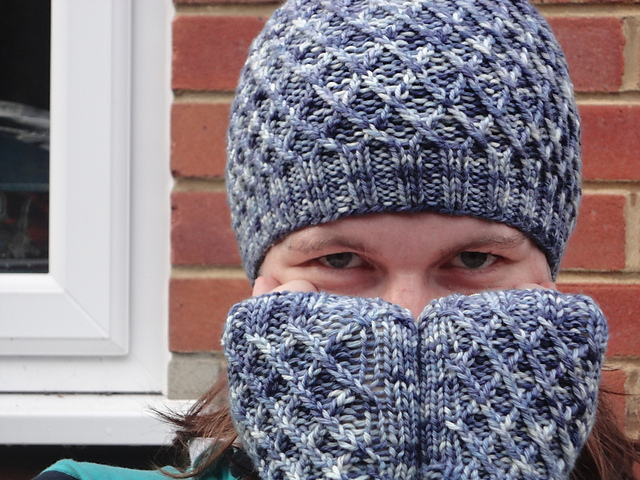
The pattern incorporated into the back of these mitts is taken from Koolhaas by Jared Flood. I knit the hat recently and had enough yarn left to make matching mitts. They work really well, although the fabric of these mitts is looser than my Free Rapunzel mitts, as the yarn is only worsted weight and I didn't adjust stitch counts or needle size! Still nice and warm though!


Related Posts Plugin for WordPress, Blogger...