Showing posts with label LARP. Show all posts

Friday, 10 April 2015

FO: Vineyard Lace Gloves

I had a bit of a sad moment last week. We had our first LRP event of the year, and it was a particularly wet and muddy weekend. Naturally, this meant my kit was also incredibly wet and muddy when I got home. This isn't usually a problem, as I have been relatively sensible in buying and making costume for the events which is machine washable. Including the handknits.

About three years ago, I made a gorgeous pair of gloves to wear at events, which were suitably elven in design to fit with my character, but modern and warm enough to keep my hands properly warm in the sometimes sub-zero temperatures.


They were the leafy fingerless gloves and I made them from Knit Picks Palette in a lovely deep green shade called Ivy. I have worn these gloves at every event I've attended since (even the ones in midsummer, as it still gets cold in the evenings). I had no qualms about throwing them in the washing machine; they survived every time when I washed them in the machine in our old house. So when we came back from the last event, I didn't even really think about it when I chucked them in the brand new washing machine in our new house.

Which was a mistake. My beautiful gloves, that have served me so faithfully, are a shrunken felted mess.


After moping about for a bit about this self made disaster (this is the first time I've ever ruined anything I've made!) I decided that the only thing for it would be to knit a replacement pair. I've not got long until the next event, and while I've got speedier with my knitting since I made these, they took me four months last time and I only have a few weeks. So I went on the hunt for a new pattern, one that would knit up quickly.

That meant heavier yarn, and losing the fingers. But I wanted to keep the green, and the leaves. And of course, for the new gloves to be made from definitely machine washable yarn!


These fit the bill perfectly. The pattern is a free pattern, found here. The yarn I have used is Cascade 220 Superwash, in the Lichen colourway. So quick and easy to knit up, I made these gloves in two days over the Easter weekend. They are warm and comfortable, and most importantly, should be machine washable!

Wednesday, 11 February 2015

Summer of Sewing

Earlier on in the year, I rediscovered my love of sewing. I hadn't really got my machine out at all since moving into this house almost two years ago, but over the summer I have been churning out all manner of things for LARP.

It started with the 
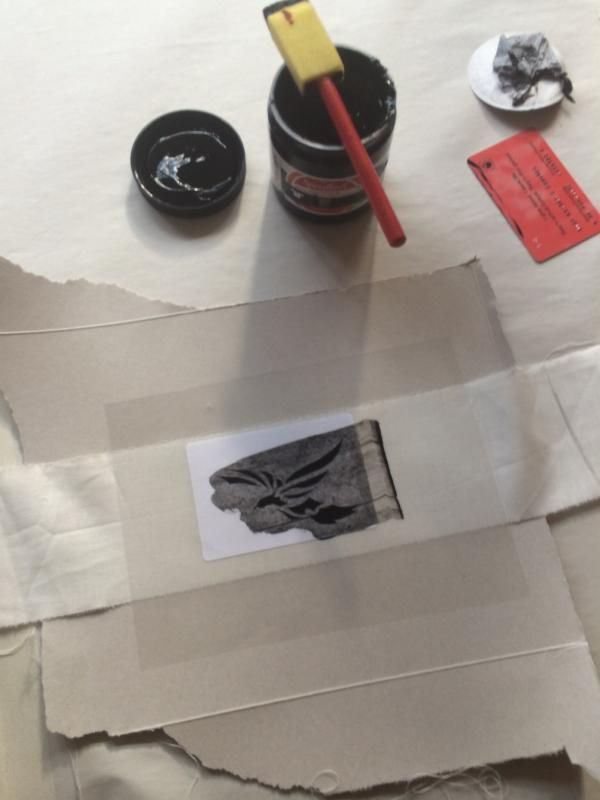
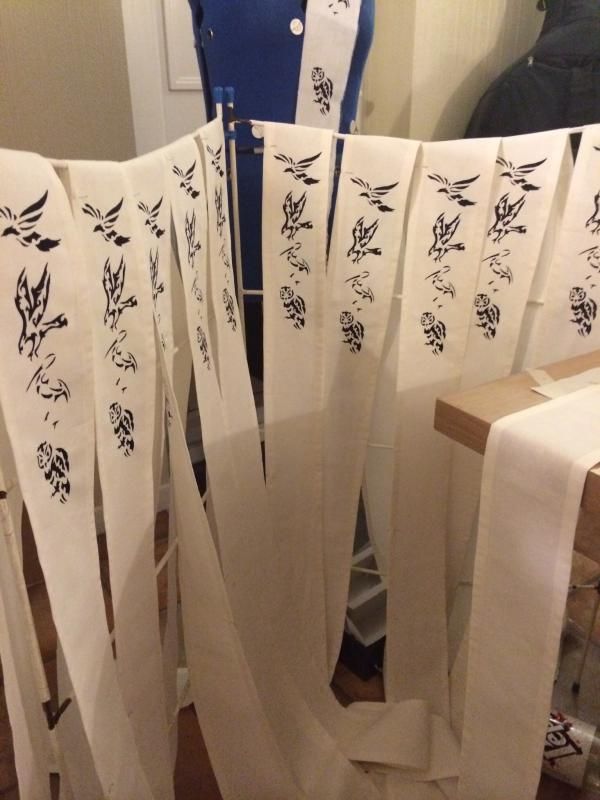
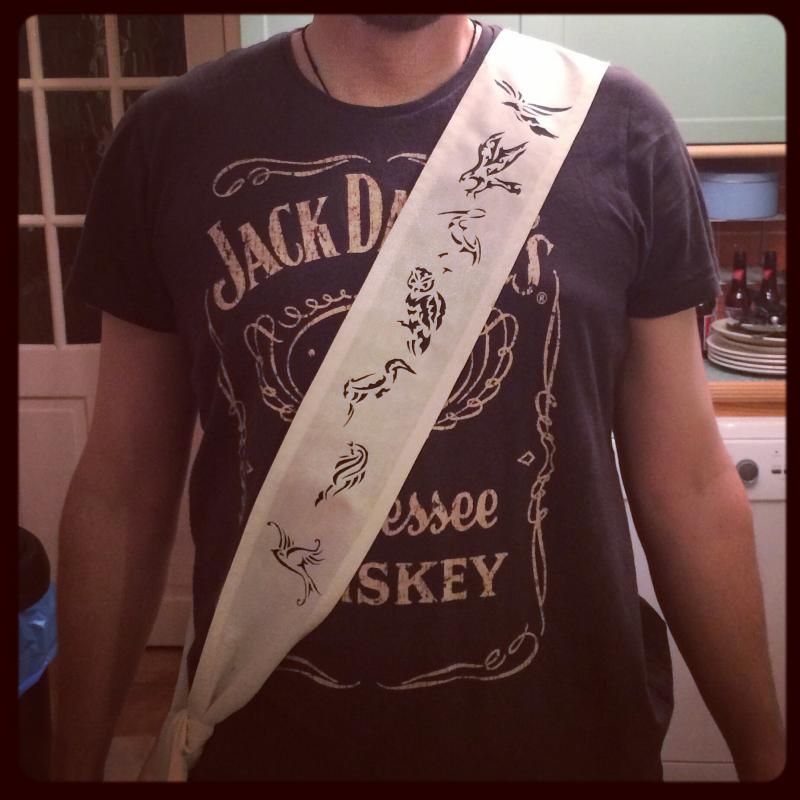
sashes I made, although the sewing was really a necessity there for me to have something to experiment with screen printing on. Once I was done with those, I started thinking about other things I could make ahead of the main LARP event on August bank holiday weekend. I don't have photos of all of the things I made, which is a shame as I did spend a week almost production lining pantaloons (more of the same as I made before), in various bright colours. My character now has eight pairs of pantaloons, which is almost enough to wear a different pair every day across all of the events I go to in a year!

What I can show you, however, is everything else I made.


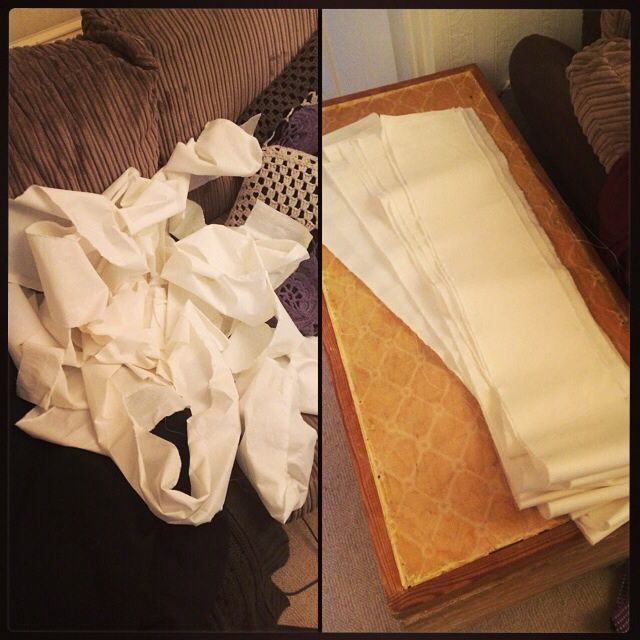
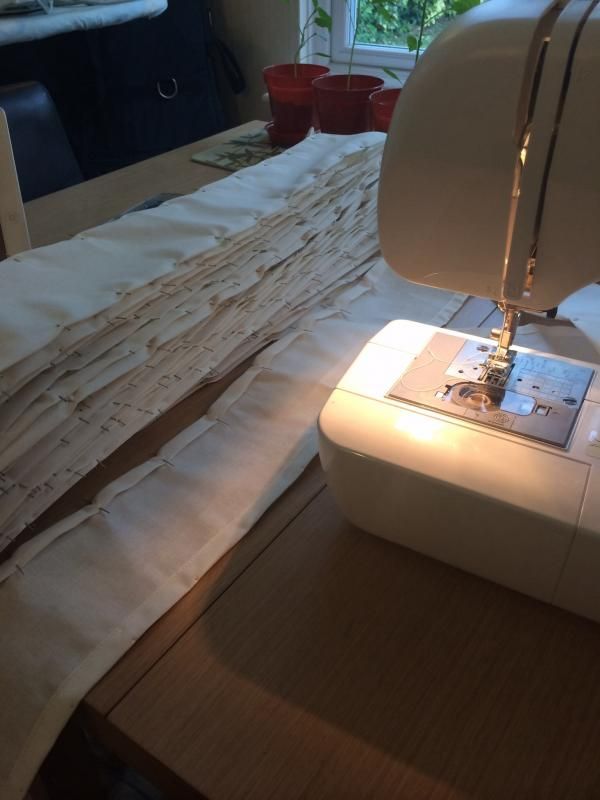
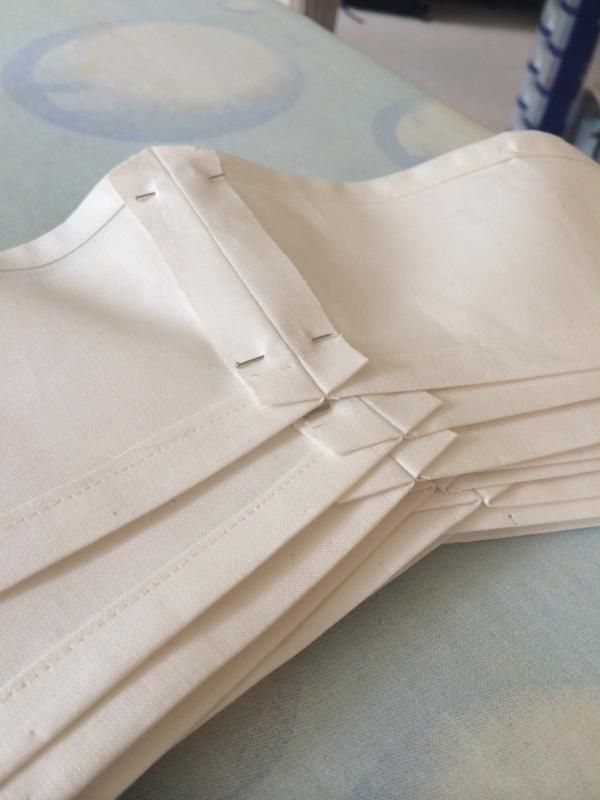
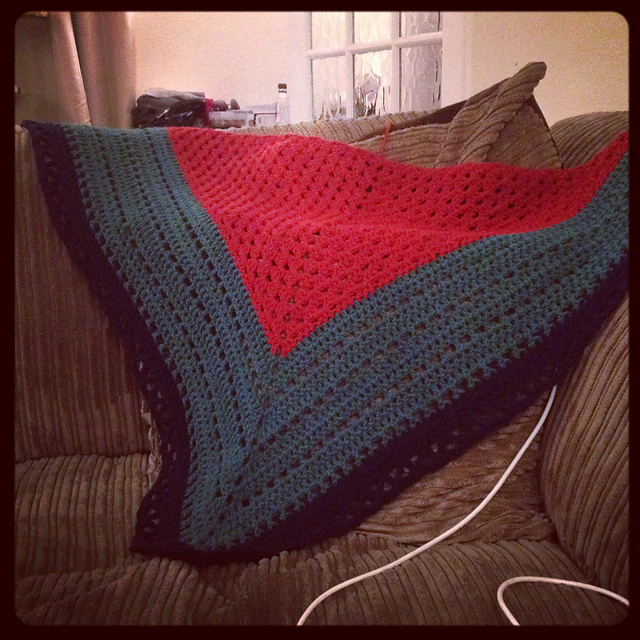
I made a lot of bunting. More bunting than I think we will ever need! I could have been lazy, and used pinking shears to cut out triangles, but as I don't have any pinking shears and I wanted my triangles to be different colours on each side, I actually cut out twice as many triangles as needed and spent three days sewing them together, trimming seams, turning them around and ironing them. Three days! Then, it took me and a friend a whole afternoon to sit and pin the triangles to the bias binding. There were a lot of pins. Worth it though, as the finished bunting looked amazing strung across the back of the pavilion we built for our tourney ground.

As part of the tourney, we also decided that the Ladies of Court would hand out favours to our chosen knights. To supply the group with favours, I picked up a cheap pack of handkerchiefs on eBay and hand embroidered the initials of each of the ladies' character names into the corner. All perfectly colour matched to our groups, of course! The opposite corner of the hankie had a butterfly embellishment already included so they looked really sweet once the embroidery was done, and it had the desired effect in character when we all stood and handed them out (even if none of our chosen knights ended up winning anything).


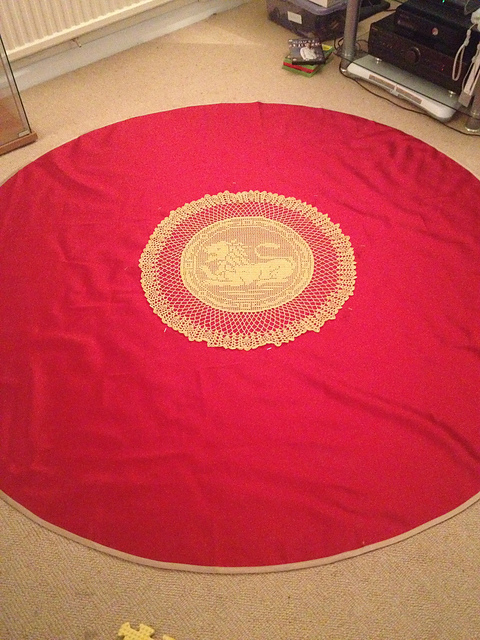
Finally, I decided to make a banner to hang in the main command tent. As the fictional land of Albion is split into ten kingdoms, each of the kingdoms has its own heraldic shield. However, they aren't used all that widely in the game by the current group of players, so I decided to try and raise their profiles by making a banner of them.

Apologies for the terrible photo, but it's the only one I have!

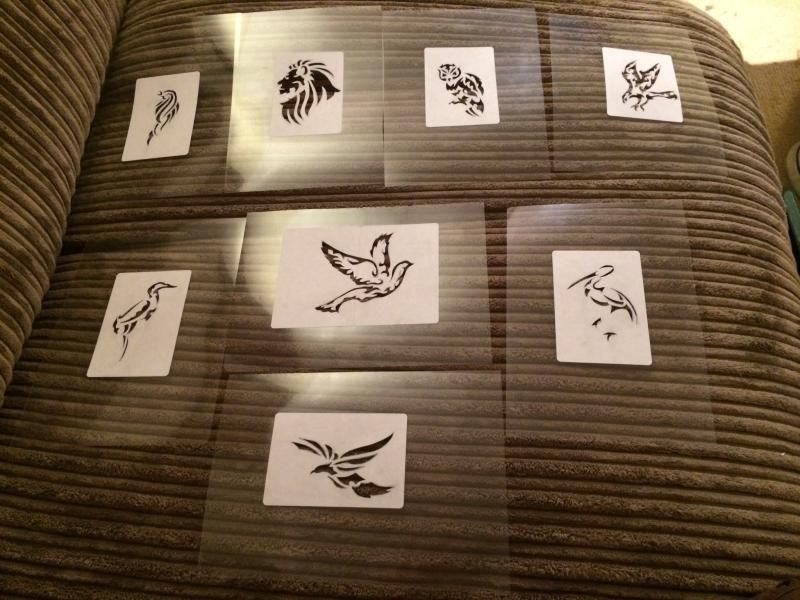
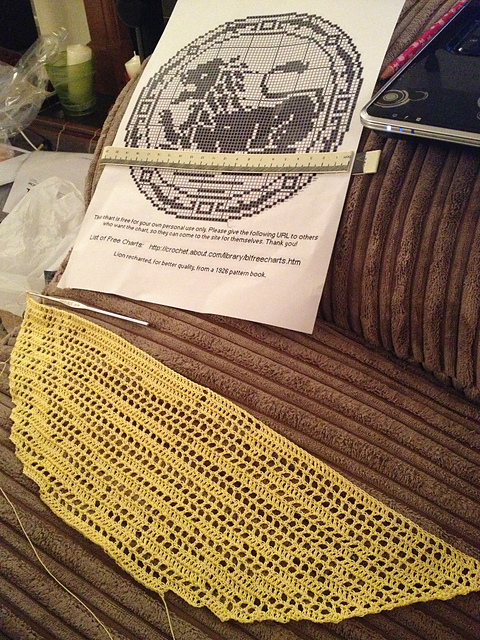
I left off the heraldic devices as I was in no mood to try and sew animals and so forth. It actually made for quite a fun guessing game in character, trying to see who knew which shields were which. Each shield was cut out and sewn individually with colour matched thread (those curved hems were a nightmare!) and then sewn in place onto the banner (made from an old tablecloth I found) with black thread to highlight the outlines. The gap in the middle was filled with a tribal lion, which I screen printed onto a separate piece of fabric before sewing on.


I had to cut the stencil into 8 parts because the fabric rectangle I was using is roughly the size of an A3 sheet of paper. Which meant it took a while to print as I had to wait for each section to dry before moving on to the next. I'm quite sad that I don't have a photo of the complete finished article, but I forgot to take one before I packed up for the event and now the banner lives in the box with the rest of the faction banners. I'll try and get one at the next event in March.

The last thing I made for LARP this year is the thing I am most proud of. The most complicated sewing pattern I have used to date. A medieval doublet for my husband to wear to our winter banquet. As the NPC (non player character) he plays for us is a King, he needed a suitably posh outfit. Again, apologies for the poor quality iPhone photos, but my camera went walkies so I couldn't take decent ones at the time.


I learned so much about making things from patterns doing this outfit. It is the first thing I have made that really needed to fit properly, and since the pattern sizing doesn't exactly match my husband's measurements, I had to improvise a bit to get the waist to fit. It actually turned out rather well, so I am very pleased. I also learned a lot about things my sewing machine can do, as I needed to make buttonholes in the shirt cuffs, so had to dig out the buttonhole foot and learn how the buttonhole settings worked.


All together, the shirt, doublet and sash took about two weeks from opening the pattern and cutting the pieces out, to having a finished outfit. It was finished on the morning of the banquet, so I was really working right up to the deadline.

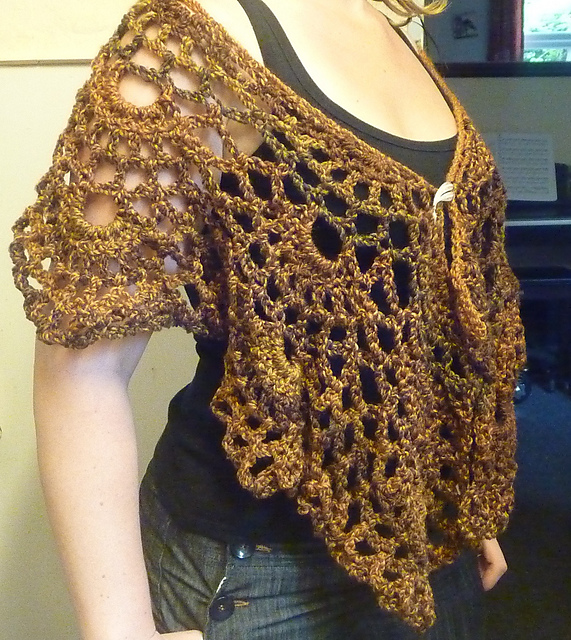
My next major clothing sewing challenge is going to be making a new coat for my character. I've found a pattern I love, I just need to find a fabric I want to use for it and then I can get cracking.

I'll be making the coat on the right

Wednesday, 23 July 2014

Adventures in screen printing

I haven't done much knitting or crocheting of late. Mainly because I have been busy working on a special, secret project which I couldn't talk about until after the most recent LARP event! At the previous event in June, I had agreed to make some sashes for my faction. They needed to look good, but be relatively simple to make as I had to make enough for fifteen people.

I decided the sewing part would be fairly simple, if I made long sashes which were tied on, rather than trying to make sashes to fit exactly. Especially considering the range of sizes in the group of people I was making them for - a huge variety of height and girth across the group. What I struggled with initially was a technique to use to get the symbols onto the sashes that I wanted - eight in total (one representing each of the in-character Gods worshipped in my faction, and one representing the faction itself). After chatting to a couple of friends, and doing some searching on the internet, I settled on screen printing as the most sensible route to take, and found this tutorial and this one. Initially, I thought I would try the embroidery hoop option, especially when I discovered you can now buy Modge Podge in Hobbycraft! But in the end I went for a very quick and lazy stencil only approach, with no screens at all.


Preparing the sashes themselves was a bit more involved than I thought it would be. I bought 4 metres of 100% cotton in a lovely muted cream colour (as I thought white would be a bit too stark and modern for my needs). I tore the material into strips six inches wide, and ironed them out. Then came the endless pinning. I have never spent so much time pinning hems in all my life. Even the excessively long hems on my skirts didn't get that much attention.


It took me a day and a half to pin all the strips of fabric (260 feet of hem!). It then only took me about three hours to sew them all and remove the pins again. Because I was making these for other people, I decided to be very good, and did all the ironing and seam pressing you are meant to do when you sew things. I even top stitched the seams at the shoulder, once I had pinned and sewn the front and back halves together.


For the symbols, I took inspiration from the descriptions of the Gods as listed on my faction's website (www.cplions.co.uk). The standard symbols (things like scales of justice, swords etc) didn't seem exciting enough to me, so I was interested when I saw each God had a bird associated with it as well. I immediately went searching on Google for tribal tattoo style images of the birds in question, and made stencils of those.

The stencils are just OHP acetate sheets, with a sticker stuck on that I'd traced the image onto. This made it easier to cut it out!

Top row L-R: nightingale, lion, owl, hawk
Middle row L-R: Heron, dove, stork
Bottom: raven

The dove in the middle of the above pic actually didn't make the cut, it was too big and complicated so I replaced it with a different design in the end.

When it came to the printing, I kept things as simple as possible. I set up a production line in my kitchen, and prepared my stencils by spraying the backs with removable adhesive spray. I sort of fudged my way through the screen printing itself, using the basic understanding of the technique I had learned from the tutorials linked above.


I bought proper screen printing ink in black, found a foam brush in my box of craft tools, and dug out an old blood donation card. I pretty much just blobbed ink on over the stencil with the brush, then drew the card across to even the ink out inside the stencil and scrape off the excess. It worked pretty well!


The only real pain was the time it took for the ink to dry. I had to do each bird separately, as otherwise the stencils overlapped with the still wet image above. So I did 13 ravens, then waited a bit. Then 13 hawks. And so on until they were all done.


Just to give you an idea of the finished article, I got my husband to try one on. All I did to them after this point was paint the legs of the storks on (as they were very thin on the image and I wasn't sure I could cut the stencil delicately enough). The Lion is on the back, over the shoulder blade.


They turned out so much better than I was expecting, and once we had them out at the event and people were wearing them, I was even happier. No photos, sorry, I was far too busy! They generated some lovely roleplay as well, as people debated over which bird symbolised which God and why.

I have another one to make before the event in August, which gives me only 4 weeks. This one will be posher, made of thicker material (probably white cotton drill, I am going shopping on Saturday to find some), and will have black bias binding around the edge. I'll probably space the symbols out so half are on the front and half are on the back. Will share progress once I get started on it!

Friday, 11 July 2014

FO: Shawls for LARP


I seem to have the worst luck when it comes to making shawls to wear to LARP. I made one back in 2011, which I wore for a season before I lost it at an event. So I made a replacement, but that has also now disappeared!

After going to the first event this year back in May without a shawl, I discovered very quickly that I don't like the evenings without something warm to wrap around my neck! So when I came back from that event, I decided to raid my stash and make myself a new shawl.


The pattern I chose is called Cheche a la sauce. I always choose crochet patterns for my LARP shawls because they work up so quickly. The yarn is Sirdar Supersoft Aran which I had left over from a couple of older projects. The red and green were used for the tomato hat I made for my friend's daughter, and the blue is from the Wycombe Wanderers hat and gloves I made for one of my colleagues. I made it bigger than the pattern, working the first section till I ran out of red. I did run out of the blue before finishing the border section, but you can't really tell.

I took this one to the last event, and it came in extremely handy as it rained very heavily on the Saturday evening (the biggest storm ever, according to the news reports!). However, the shawl is perhaps going to be too warm for the event this weekend, as the July event is traditionally the hottest of the year. So I ordered another ball of James C Brett Marble Chunky, and crocheted a third version of the original!


I've gone back to my original colour choice for this one, and hopefully I won't lose it almost as soon as I start wearing it!

Friday, 13 September 2013

More LARP tat

I don't know quite what it is about this hobby, but LARP provides so many opportunities to be creative! One of the main themes of my character's experiences over the last four years has been falling in love with people, only for them to die in incredibly harrowing circumstances. Before I went to Renewal, I had been idly considering making a locket containing a drawing of one of those characters, who had died almost two years previously.

This is us three years ago.
Copyright Iain Sewell

I didn't get a chance to do it before the event, as for once there weren't any decent lockets on sale in Claire's Accessories! It's usually such a handy place for LARP suitable jewellery tat. So I went to the event without my locket, and figured I'd sort it out when I got back.

What I didn't realise was that at some point during the event, the other characters I was extremely fond of would also end up dying! (Seriously, it appears to be a really bad thing for you to have my character like you. It's like an accelerated death sentence. I think I might have to become a nun or something to stop it happening again!). So when I got home, after I'd recovered from the event, I decided to rethink my locket idea. I found one on eBay that could hold four pictures, and set about finding a decent IC head shot of all four of the friends I'd lost.

I used Picasa to edit the photos to make them look like pencil drawings, and mucked about with the photo printing settings in Microsoft Picture Viewer to print them as small as I could. Ten minutes carefully cutting them out and sticking them into the locket (protected with that fab stickyback see through plastic stuff you can buy) and I have a gorgeous piece of kit that I cannot wait to wear to the next event (if only for the lovely roleplay it will generate when someone asks to see what is inside).


I am so pleased with how this has turned out. And it only cost me a fiver!

Wednesday, 11 September 2013

Cake painting

Before the last LARP event, I decided I was going to decorate a cake for an IC coronation we were planning. The faction I am now part of is big on heraldry, so it was an easy decision to make to create a cake adorned with the heraldic device of the kingdom we were holding the coronation for. Unfortunately, the in game heraldry was not designed particularly well, so I had some pretty tough source material to work from.

The shield of Essex

I spent ages thinking about the best way to achieve this on a cake. I settled in the end for airbrush food paint, as I thought stencils and using Jamie's airbrush (that we bought for painting 40k models!).


Our first experiments with the airbrush didn't go so well. The paint transferred onto the icing alright, but I couldn't get crisp edges from my stencils, and the risk of the red and blue bleeding into each other and making a horrendous blackish-purple was too high. In the end, I settled for painting by hand.


I decided to do two cakes, as the only pre-iced cakes I could find were quite small. This Lion is one I found in a Google image search, which co-incidentally turned out to be exactly the same one as the previous Kings had used as their symbol and was all over banners all over the camp! It took a couple of coats of the food paint to get a good clean covering, but it was worth the effort.


I failed to get a picture of the finished cakes. The Essex cake had "Long Live the Queen" iced around the edge, and the Lion cake said "We Shall Not Falter".

I was so pleased with how they turned out! And everyone at the event said such nice things about them. I have already started planning my second attempt at cake decoration.


I'm going to do a much bigger one this time, with all ten shields on it. Some of them have quite intricate designs, and they will be smaller than the one I made (only 3 inches tall) as they will be adorning the side of the cake rather than the top. I've found a decent sized iced sponge cake on the Waitrose website, which I will be ordering as soon as the date for the banquet is announced! Watch this space!

Tuesday, 10 September 2013

Radio silence

Well, seems I've not been around here in a while! I've been quite busy since I last posted, mostly because of LARP.

I'm afraid I didn't get any decent pictures of my new kit from the event; I have this knack of avoiding all the cameras it seems! The only picture that has appeared so far is this one:

Copyright Steve "Flasher" Mitchell
It was taken during the battle on the last day of the event. The High King of our faction and his sister had just been killed, and I spent the rest of the battle crying over their bodies and not doing anything useful at all. In fact, the event as a whole was so emotionally draining (I don't think I've ever cried so much in such a short period of time!) that it took me almost a week to get over it!

While I managed to avoid most of the cameras, I'm fairly sure I was caught on video a few times through the course of the event. A film crew (Slender Pictures) was there getting material for another promotional video, and I was interviewed by them as part of that filming. When the videos are released, I will be sure to share them with you!

Of course, I came back from the event full of enthusiasm for LARP, even though the season is now over. Lots of ideas for new kit, and other things to make! Unfortunately for you, and this blog, most of that creative energy has been poured into the writing of an IC journal for my character, spanning the last four years of game play. It's up to 25,000 words already, and I still have most of the last event to write up. Once that's done, I'll turn my writing energy back to this blog. I may even have some knitterly progress to share for this week's Year of Projects update!

Wednesday, 21 August 2013

FO: Embroidered vest

Tomorrow I head off to Buckinghamshire for a weekend of prancing about in a field pretending to be somebody else. As I've mentioned before, I've been working on a new piece of kit for this event, an embroidered vest featuring the symbols of my current nation and the nation I am moving to in game:

This was a test on some fabric scraps
to see if the stencil worked ok

Last time I posted, I had just made a start on actually embroidering the design to the back of my vest. Well, with the event looming ever closer, I finally got round to finishing it last weekend.

The embroidery itself didn't take me all that long, in the end. I finished that about four weeks ago! What's taken the time has been figuring out how to sew the chiffon I bought to trim the arm holes and waist with. I don't have an overlocker, so had to come up with another way of preventing the cut edges from fraying. After several attempts to sew the edge after cutting, I decided to do it the other way around.


I drew the shape I needed with chalk, then zigzag stitched around what would be the raw edge, before trimming very close to the outside edge of the sewn border. This seems to have worked, and the finished edges don't look like they're about to start fraying any time soon.


I'm really pleased with how this has turned out. Relatively inexpensive too, as all I've had to buy is a metre of chiffon and a metre of black ribbon.


I'll try and get some pictures of me wearing it at the event, so you can see it with the rest of my kit.

Thursday, 18 July 2013

Getting sidetracked (again!)

When I came back from the last event in June, I found myself suddenly needing to crochet a giant tablecloth in less than four weeks. Having succeeded at that, I have returned from the most recent event last weekend with an even more complicated project in mind! Luckily, there is more time between now and the next event (August Bank Holiday weekend) so I should be alright.

I've decided I need some more costume. I have one vest that I wear all the time because it is so comfy and goes with everything.

Photo by Nikki Flynn

I decided I needed more of them. I don't have a pattern, so had planned to reverse engineer from this one (which was I believe originally from Next, although I got it on eBay). Then I found some old cardigans from New Look that I thought I could adapt for a lot less hassle.


It's a nice drapey viscose fabric, which has the added advantage of not fraying when you cut it! I hacked the arms off just below the shoulder seams, and cut the length down to get rid of the very modern-looking pockets.


I need to find the right material to trim the bottom hem and sleeves, to match the style of the other vest. In teh meantime, I've turned my attention to the motif I'm going to embroider on the back. I've designed a symbol based on my character's current allegiance to two different factions.

The dragon represents my current faction.
The lion represents my new faction.

I made a stencil and quickly mocked up the motif in paint on a different black fabric, just to check it looks ok in my chosen colour scheme.


I'm quite pleased with it. I've sprayed the stencil (in reverse) on the inside of my vest, and an slowly embroidering the image on using some white and red embroidery thread that I had lying around. So far, I've done most of the lion and it's looking pretty good. I think I might have to match the trim to the red embroidery thread, which could be difficult. It's a much more winey red than the paint I used.

Will share some progress when I'm done with the embroidery!

Tuesday, 16 July 2013

FO: Lion Tablecloth

I did it! I finished the tablecloth before the event. I was so pleased when it was done, because it looks awesome.


The above was taken when I was still partway through sewing the damn thing on. In the end, I only sewed around the main motif in the centre, and left the border to do its own thing.

Photo taken by Nikki Flynn

Here it is laid out on the Round Table, just before we set the tea party up. I think I gauged the size perfectly!

Photo taken by Nikki Flynn

And here we are enjoying our tea and cake! The tablecloth was very well received, so I'm glad I spent so much time on it over the last month.

I have another crazy project on the go now, ahead of the next event in August. I have six weeks to pull this one off though, and it's a sewing project rather than crochet or knitting (although, I do have a couple of things to crochet as well). More about that later in the week!

Wednesday, 10 July 2013

I hate ironing

There is a reason I don't do a huge amount of sewing, and that is ironing. The tedious task of ironing every piece of fabric before you even get to cut out a shape or thread your needle. I am not the biggest fan of ironing; I hold to the philosophy that if you take clothes out of the machine as soon as it's finished, and hang them up, you don't even need to iron your good shirts. So it was with some trepidation that I embarked on the next stage of my lion tablecloth project.

The last time I shared this project I had just finished the main section of the centrepiece:


The plan was to crochet the lion, then sew it to the centre of a large red tablecloth. I found the perfect cloth on eBay, but when it arrived it had two issues. One, it was a lot bigger than I thought, or rather the lion was too small. Two, the cloth had clearly been folded up in its packaging for some time, because it was incredibly creased.


So I had two problems to solve. The lion came first (anything to put off the dreaded ironing). I trawled the internet looking for inspiration for a border I could use to make it bigger. In the end, I sort of made it up as I went along!

It doesn't show up well against the blocking tiles,
but you get the idea.

The first seven rows are simple chain loops. The rest of the border is stolen adapted from the All Shawl by Doris Chan. Fully stretched out, my centrepiece is now 26" across, which should fit much better into the centre of my 70" tablecloth.


Last night I finally dug up the courage to get out my ironing board and tackle this enormous tablecloth. I won't lie to you, it was not fun. Especially not when my darling husband appeared with an armful of shirts (which, against my usual practice, had not been hung up immediately after washing), so after getting most of the creases out of the tablecloth, I then had to carry on and iron a whole load of clothes!

This evening I absolutely have to sew the lion to the cloth, as on Friday we will be driving up to Staffordshire to go to the next LRP event, where I will be presenting the cloth as a semi-surprise gift to a group of friends. They've seen the first photo, but nothing since! Fingers crossed I have no issues with the sewing element of this project, and I'll be able to share some great pictures of the tablecloth in action when I get back from the event.

Tuesday, 25 June 2013

Speed Crochet

I've outdone myself this time. Last week, after returning from a LRP event, I decided to attempt to make a tablecloth in under 4 weeks. For an 8' round table. Using filet crochet. Crazy, I know.

But, somehow, I've pulled it off.


Ok, so I'm cheating a bit. I've crocheted the centrepiece, which is about a foot, foot and a half across. I plan to sew it to the centre of a large red tablecloth I've found on eBay, as the prospect of crocheting an entire tablecloth in this fashion is not an appealing one!

I'm hoping the cloth will arrive in the next few days, so I can sew it this weekend while I've got the house to myself.

Thursday, 20 June 2013

Getting Sidetracked

I made some wild promises to myself last week that now I was back in my normal routine, I'd get back to blogging on a regular basis. But I seem to have thrown myself so wholeheartedly into doing things I can then blog about, that I run out of time to actually blog about them!

Last weekend I went back to LRP for the first time this year (having missed the first main event on account of it happening the weekend before the wedding, and knowing my luck, I'd have broken my ankle or something if I had gone). There are a surprising lack of photos of me from the event, although thinking about it I wasn't out and about as much as I usually am, on account of having thrown myself down the stairs in our house the night before we left for the event!

One of the things I got up to while I was there, was get myself invited to an In-Character tea party on the Saturday afternoon, hosted by the lovely ladies of the Arthurian-based faction, known as the Lions.

Photo shamelessly stolen off Facebook, I am sure my friend won't mind.
That's me in the bottom right corner - I was late so got stuck with a tiny chair!

Much tea (of the long island iced variety), sangria, Pimms and cake was consumed and it was an incredibly good laugh. So much so, that we're doing it again next event. I foolishly joined the ladies on Sunday afternoon where we discussed the possibilities for making it even cooler, and wound up volunteering to make a girly, Lion themed tablecloth for the Round Table so it looks more ladylike when we're having tea.

I hunted around the internet for ages after I got back, and couldn't find a decent pattern to use. I wanted a rampant lion, as that is the heraldic device used by this particular Faction. Something like these. Unfortunately, despite every effort to take a black and white image and use this rather funky chart creator I couldn't get a chart I was happy with, so settled instead on using this one which is free on about.com's crochet pages:


The lion will form the centre of the tablecloth; I will cheat and use fabric for the rest, as I only have three weeks till the next event and I said I would have it done by then. I'm using the same crochet thread I bought for my filet daffodils which are in hibernation, as I reckon I have spare. I'll use red fabric, and I haven't yet decided to cut a hole in the middle or to just sew the filet panel on top. I may even do a crochet border, if I start feeling cocky, but given the table is 8 foot in diameter I may not!

So, not a project from my current Year of Projects list, not even one from my new Year of Projects list, or a current non YoP WIP. I've let myself get completely sidetracked again.

Saturday, 13 October 2012

Deja vu

A little while ago, I posted about losing one of last year's projects. My Crochet Lacy Wrap was one of the first finishes off my list for the first Year of Projects, and I was very happy with it.

This was taken as soon as I'd finished it. I never took
a proper photo of it once it had been steam blocked.

I've been wearing it all year as a scarf at LARP, because the acrylic chunky yarn is great for keeping me warm when I'm wearing my low-cut costume. However, I lost it at Renewal in August, and have been sad about that ever since.

Another ball of James C Brett Marble Chunky happened to fall into my basket while shopping online at Deramores, this time in the catchily named colourway "25" (the original wrap was colourway "16").


Left to my own devices one evening, I wasn't feeling up to the endless rows on any of my knit projects, and wanted something simple to work on. Out came the 10mm hook, out came the chunky yarn and away I went.

I had some difficulties getting started. I was convinced the pattern was wrong, as I couldn't get the first row to work in the stitch count given. I got rather cross with myself for not having made any notes about it last time. I drew out a chart, to make sure the stitch count was correct. I may have had a bit of a tantrum, and nearly threw the yarn and hook across the room in frustration. Then I realised it was all my fault, and I was the one making the mistake. I had miscounted my starting chain. Four times in a row.

Once I got past that, the rest of the wrap was easy.

This one is a lot paler in colour than the original

Once again, I was surprised by the difference in colour between the internet photo (above) and the actual yarn. The first ball I bought was far more ORANGE than I was expecting; this one was far paler than I though it would be.

Finished in one evening but not steam blocked yet (although I will have to do that before I go to the next event, which is in November). And a big note to myself, if you make this again, COUNT YOUR STARTING CHAIN PROPERLY!!! There will be far less tears and tantrums that way.
Related Posts Plugin for WordPress, Blogger...