Showing posts with label warhammer. Show all posts

Friday, 7 February 2014

Warhammer Scenery - Ruined Buildings

As well as painting our Battle Board, we have also recently painted up our selection of Games Workshop terrain pieces. We had one each of the Basilica Administratum, Manufactorum, Sanctum Imperialis and Shrine of the Aquila sets, and had built them pretty much to the template on the front of the box. We'd not painted them for ages, due to not really being able to settle on a colour scheme! Well, fuelled by our success with the board, we decided to get a move on and sort out the buildings, and agreed on an approach to take.

The Basilica Adminstratum
After the seemingly endless job of cleaning off all the mould lines, everything was undercoated in black. The walls were drybrushed quite heavily with a succession of greys (Charadon Granite, Adeptus Battlegrey, Fenris Grey and Astronomicon Grey). All of the gold detailing is done with Vallejo Liquid Gold in Old Gold. Much better coverage than trying to use Citadel metallic paint! All of the skull details on the outside were drybrushed again with Astronomicon Grey.

The Shrine of the Aquila

The floors were painted in one of two ways. The plain metal grate tiles were heavily drybrushed with Macharius Solar Orange, followed by Boltgun Metal, to give us a lovely rusted look. The checked tiles we painted with Mechrite Red and Dheneb Stone. We thought we'd have to do more to it than that, but the finished look with just the basecoat is exactly what we were after! Dheneb Stone was also used to paint the scrolls on the front of the Sanctum Imperialis.

The Sanctum Imperialis

There's still a fair bit of detail unpainted, but for now they are more than good enough for us to use on our painted board. At some point we'll go back over them and pick out all the little details, like the lights inside and out.

Will share the Manufactorum when it is closer to being finished, for now it just has a basic rusty metal thing going on, but none of the details are done yet!

Thursday, 30 January 2014

Warhammer Scenery - Realm of Battle Board

As any hardened war gamer will know, when you first start out with this hobby you're happy to just roll out a mat to play on, and use empty tissue boxes as hills to make it interesting. Then, as you get deeper into it, investing a lot of time and effort and money into your army, spending hours and hours painting your models to get them just right, you realise you ought to be investing a little bit more time in your terrain.

Such was the case in our house. The only real investment we made in our gaming board in the early days was a 6' x 4' sheet of MDF (cut neatly into two halves for ease of storage) and the old Games Workshop battlemat. Not long after, we bought a couple of the hills and some trees. That lasted us for a good few years, but once we'd switched our focus from Warhammer Fantasy Battle across to Warhammer 40k, we decided the lush green battlefield we had didn't really cut it for the gritty battlefields of the 41st millenium!

It was about the same sort of time that Games Workshop brought out the Realm of Battle board, so after much debate, we eventually invested in one. It was left unpainted for quite a while, as we couldn't decide how to do it. Plus, a lot of our models were unpainted as well, so it didn't seem out of place to be playing on an unpainted board. More recently, however, we've found ourselves able to field almost full armies of painted models, and the unpainted scenery was starting to jar a little. So back in October we decided to start painting it.

We spent ages online looking at the various different ways people had painted theirs. We eventually decided on a brown colour scheme, a sort of desert(ish) wasteland theme. We did the base layers, but then it sat half painted for a couple of months while we figured out how to finish it off. A couple of weeks ago, we sat down in front of the telly and got out the paints again, and after several hours of endless drybrushing, it is now almost complete.


It makes such a difference having it properly painted. It's not quite finished, as we still need to varnish it and finish off the skull pits with water effects. So it's currently living on the dining room table, as we can't put it away until we've protected the paint job.


It was a bit of trial and error to get the colour scheme to work, but here's a run down of how we did it in the end.

1. We basecoated the entire board with black paint (we used a spray can of black we bought in Wickes, as it was slightly cheaper than the Games Workshop Chaos Black spray), and then sprayed the whole thing brown, leaving the exposed rock edges black. The brown spray we used was from Halfords, their own brand Camouflage Spray Paint in Brown - ultra matt. Lovely coverage - we used about one and a half cans for the whole board.

2. The rock sections were all painted with Adeptus Battlegrey from the Citadel foundation paint set.

3. Rock sections drybrushed with Astronomicon Grey from the Citadel foundation paint set.

4. The brown areas of the board were drybrushed with yellow acrylic paint. Rather than use up the expensive-in-large-quantities Citadel paints, we bought a tube of Galeria acrylic paint from Hobbycraft in the colour Yellow Ochre. Using 1" flat brushes, we managed to do all six panels in less than the running time of Man of Steel. The skulls in the pits were heavily drybrushed with Bleached Bone Citadel paint, then two layers of Thraka Green Citadel wash was applied. We still need to go back over them and drybrush the very top edges with Bleached Bone, before filling the pits with Woodland Scenics Realistic Water.

5. The skulls and bones found in piles around the rocks on the board were painted with Bleached Bone, and then washed with Agrax Earthshade Citadel wash.

The craters (set from Games Workshop) were painted to match the battleboard. Undercoated in black, sprayed with the same brown spray and then heavily drybrushed with the yellow ochre. To define them a little more, we chose prominent sections of the crater edges and drybrushed them as rocks, using the same combination of grey paints as above. We then went over them with Scorched Brown Citadel paint, drybrushing inside the craters to darken down the interior of the crater.


To properly see how it looked, we set up a mock battle on the board using only fully painted models. It's a bit one sided, as we have painted far more Chaos Space Marines than we have Imperial Fists!


I still have a fair few bits of scenery work to do; I've got some homemade pieces that haven't been painted yet, and I need to sort out the bases for my Imperial Fists and that second Heldrake. The buildings already on the board in the shot above are not quite finished either, lots of little frustrating details to do, but I will share progress on those so far in another post.

Thursday, 27 June 2013

Warhammer Scenery - Heldrake Base

Back in October last year, I took some time out of my knitting/crocheting schedule to help Jamie out with his Chaos Space Marine army. See, the deal we have is he paints the models, but I do the bases. I did a few funky rocky bases, but was then struck with the inspiration to make some proper scenery.

Serious crafting requires artistic vision

I started small, just some interesting embellishment for the flying base of his heldrake model and a simple rocky outcrop to use as terrain during a game. The building part didn't take very long, but I lost interest when I was stuck with the endless painting.

Now we have an airbrush, the painting part is a lot easier, so I've pulled it all back out and set to with a will! First to finish, the heldrake base.


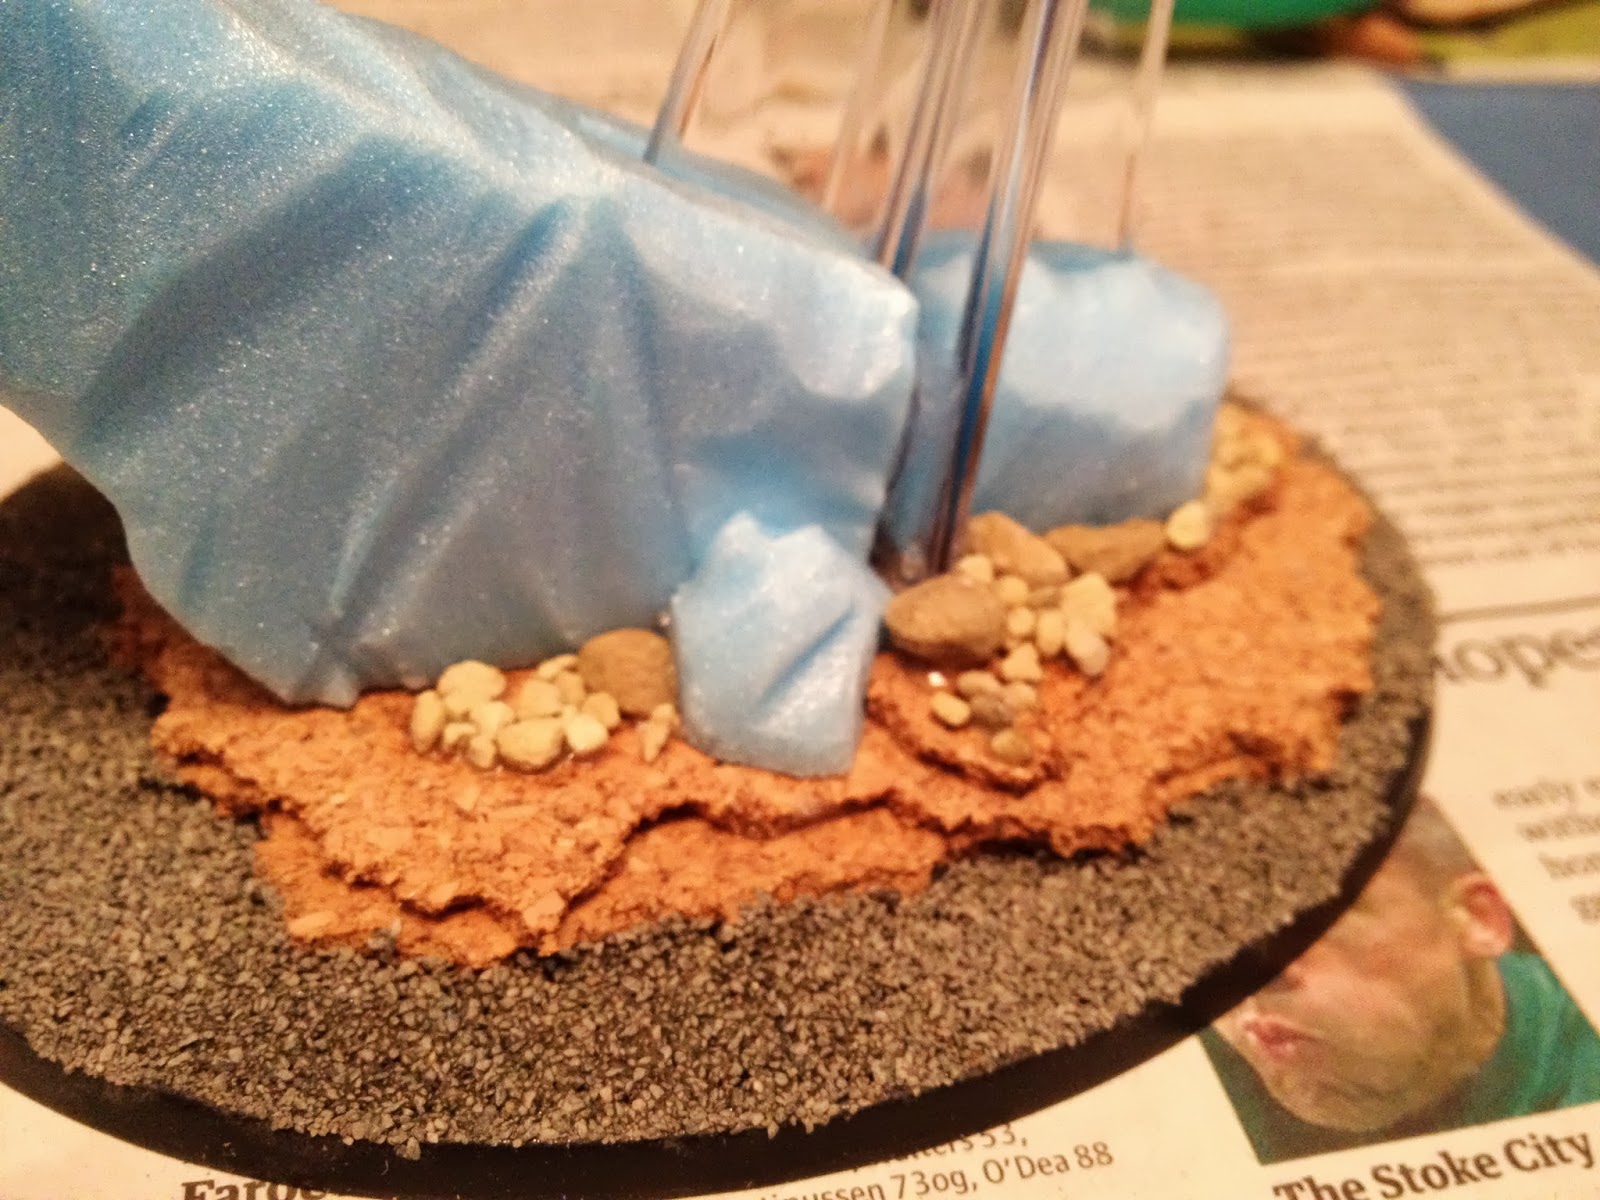
After placing the flying stem and gluing it down, I used cork sheeting and a hot glue gun to add some height to the flat base.


I filled the rest of the base with plain old boring basing material (I think this one is labelled as "lava").


Next up was the fun part. The rocky spur was made from polystyrene sheeting, cut and carved to fit with a hot wire cutter. I love my hot wire cutter, it's so much fun! I had to cut two separate chunks to get it to fit around the stem.


Carving it to look like rock is a real skill!


The ground around the spire was decorated with smaller stones and some carved boulders.


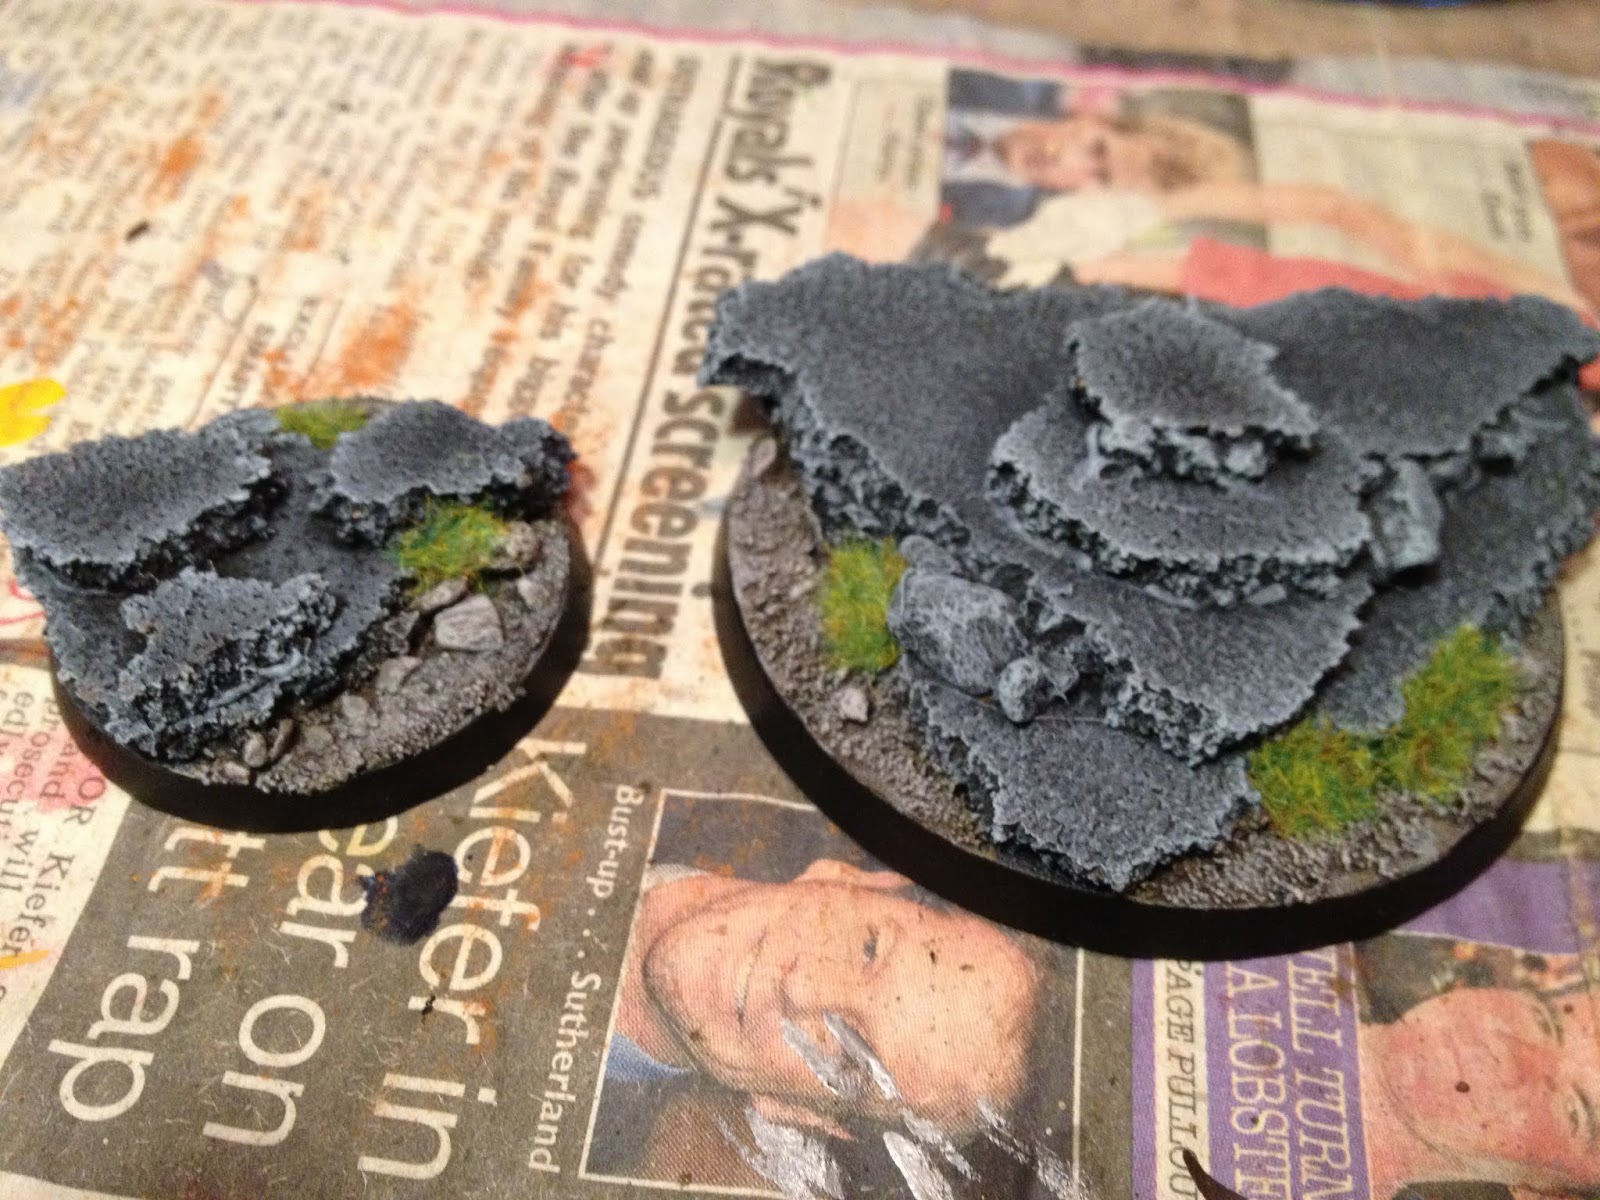
The stem was then masked with tape to protect it from paint. All of the rock parts were painted with textured masonry paint (a couple of coats) and then the whole model was undercoated with black spray. At this point I got fed up of the painting aspect (it takes ages to dry!) and the base remained in this state until last week.


After just half an hour with the airbrush (most of which time is spent cleaning the damn thing between colours, and hunting for the right bottle of paint) the rocks were done! All over spray with a dark grey, then an almost all over spray with a lighter grey, finally targeted highlights with a light grey.

The sand was sprayed dark brown, then highlighted up with two lighter shades of brown. I wanted the model to fit the colour scheme of the other bases I'd painted last year, sandy bases with grey rocky outcrops.


The finishing touches were the greenery. Some twigs robbed from the back garden, pushed into the polystyrene behind the stem become trees, with clump foliage (from the model railway section of the model shop) glued on with Copydex (which smells of fish, by the way, it's horrible stuff). Some additional clump foliage around the base of the tree and to hide the hole where I miscut the rocky spire to fit the stem, and some static grass on the sand to cover the gaps.


I really love the effect of the tree. I'm also really pleased at how closely my finished base resembles my initial visualisation!


Jamie has since bought a second heldrake, so I will be putting my thinking cap on again to create a second base that matches but is different.

In the meantime, I'm going to finish painting the rocky spires terrain piece, and a gothic ruin piece I started at the same time as these. With the ease of painting provided by the airbrush, I can see myself making a lot more scenery over the next few months!

Tuesday, 23 October 2012

Warhammer Scenery - Rocky Bases

I've not really done much crafting outside of knitting and crocheting for some time now. Not really living up to my self proclaimed title of Master of a Thousand Things! But this past week or two, I've been focusing on a different sort of crafting - making bases and scenery for Jamie's Warhammer 40k models and games. I've been sharing pics of my progress on Instagram (you can find me there as supertinks), but thought I'd share the work here too, as I am quite proud of what I've achieved!

I started out with something simple - bases. Jamie's been on a real drive to finish off his Chaos Space Marine army, but none of the models bases had been painted. This is because Jamie lets me do that, and I hadn't been in the mood for some time. With the army nearing completion, I thought I'd better get started.

Chaos Lord
Taking inspiration from the Chaos Lord model, who comes with a moulded rocky base, we decided to go for a simple rock and sand look, using static grass to artistic effect on each finished base. Having recently got my hands on some proper basing materials, we decided to make suitably impressive bases for the other character models and large models in the army.

Typhus (image from Games Workshop)

Jamie bought the above Typhus model recently, and I thought I'd start with that. The model is an old sculpt, so it's not particularly dynamic. It comes with a plain base, so I took some thin cork sheeting and made him a little rocky platform.


I had to be careful to keep both sides of the platform level, as he's designed to sit flat on the base.


I just tore the cork sheeting into appropriate sizes, and glued it down with a hot glue gun. The stones were added afterwards, using the hot glue gun for the larger ones, and PVA glue for the sand.

Spurred on by the relative ease of building that base, I got out the Helbrute model from the Dark Vengeance box set.

Image from Games Workshop

Another model designed to sit flat on a plain base, although this one is more dynamically posed and has a stone underneath one foot. Whatever I did had to incorporate that stone.


I used the same principles, tearing up cork sheet to build my rock, before adorning the gaps with stones of varying size and gluing sand to the remaining exposed base. The cork was shaped to fit the large feet of the model.

Painting the bases was easy. I just used the same colours I used on the pre-made base above. They were undercoated with the Games Workshop Chaos Black spray, then a heavy drybrush of Adeptus Battlegrey from the Citadel foundation paint range.


After that dried, I highlighted the rock with a drybrush of Astronomican Grey (also from the foundation paint range).


Once that was dry, I turned my attention to the sand. This is the most ridiculous part of painting Games Workshop bases, as you stick perfectly reasonable sand onto the base, then paint it to look more like sand. If you don't paint it, it doesn't look real compared to the rest of the model!

The sand is first painted with Khemri Brown (foundation paint).


Then, a wash of Devlan Mud (from the Citadel Wash range).


Once the wash was completely dry, I drybrushed the sand with Dheneb Stone (another foundation paint). When I was done drybrushing, I took some Chaos Black (from the Citadel paint range) and painted the edge of the base.


The final touch is to glue on some static grass in strategic places. I use the grass to hide particularly poor areas of the base, so gaps in the sand material on the base itself, or embarrassing looking areas of the cork, for example where there is a splodge of glue showing.


And here are the finished bases with their (still unpainted) models balanced on top:


I am particularly pleased with the way the helbrute sits on his base. Once Jamie has painted the model, and the rock under his left foot has been painted to match the base, it will look seamless.

In order to attach the models to the base when they are done, we will drill into their feet and insert metal pins, which will push easily into the cork and provide a more stable attachment than simply gluing them down.

Following the success of these bases, I have turned my attention to more exciting bases, such as the bases for the flying models, and building proper battlefield scenery pieces. These are still works in progress, but I will be back with step by step guides to how I put those together once they are done!

Friday, 8 July 2011

FO Friday - the Super Seekrit edition

We recently celebrated a friend's birthday, so now I can finally share the presents I made for her! I first had the idea to do these back in May; after a week of having the patterns sitting in my Ravelry queue I just had to start working on them.

Of course, as Em is on Ravelry as well, I had to be sneaky about it! I set up my project pages, so I could have someplace to record how much yarn I used, and what dates I made them over, but didn't add any details on what pattern it was or anything. I set them to hibernating so they'd most likely appear right at the bottom of my project list, and not be noticed. And I made a project photo picture that says "Ssssh! It's a secret" just to get the idea across!

But, now they have been gifted and well received, I can share them with you! There are actually 4 of them, but only two were for Em. The other two were half practice-goes, half I-really-want-one-too.

Super Seekrit Project 1, aka Yoda for me

Super Seekrit Project 2 aka Yoda for EmmyLou

Pattern: Yoda - Star Wars Mini Amigurumi by Lucy Ravenscar (direct link to etsy shop listing)
Yarn: Sirdar Bonus DK
Hook: 3.5mm
Additional Materials: 2x 8mm safety eyes (each), fibrefill stuffing

This pattern is awesome. As written, you get the original Yoda with the pale brown belted robe (project 1), plus additional instructions for creating a more traditional looking Yoda in a dark brown outfit with pale brown hooded robe. Lucy's instructions are very clear and well laid out, I had no trouble at all putting him together.

This was my first experience using safety eyes, though. I did a bit of searching to see if there was a trick to getting them on, but it would seem not. If your fingers aren't in complete agony by the time you hear the little click, you're not doing it right! I actually had to get Jamie to help me on these two.

When it came to deciding which one to give Em, quite clearly it was going to be Yoda number 2. I think he looks awesome. Plus, the robe, totally comes off. You can dress and undress him! Not sure why you'd want to, but anyway.... moving on..

Super Seekrit Project 3 aka R2-D2 for me

Super Seekrit Project 4 aka R2-D2 for EmmyLou

Pattern: R2-D2 - Star Wars Mini Amigurumi by Lucy Ravenscar (direct link to etsy shop listing)
Yarn: Sirdar Bonus DK
Hook: 3.5mm
Additional Materials: 2 x 10mm safety eyes, 1x 8mm safety eye (each), fibrefill stuffing

This one was a little trickier, because in order to have poseable legs, you have to attach them to the body with safety eyes forming the joints. Cue more cursing and screaming in pain as we tried to get them to attach! I decided to test the pattern first by making myself a proper blue R2 unit. This pattern is awesome. It's so quick, and so easy, and so clever. By the time I was done with my R2, I couldn't wait to get started on Em's.

The second R2 unit is green, because in a recent weekend Star Wars roleplay game, Em played a green R2 unit, and I wanted to make a mini ami of her character. This appears to be a tradition Jamie and I have now started, as last year we made a diorama depicting her Dark Heresy character casually blasting her way through an industrial landscape with her custom multi melta:

Not the best photo we have of it; when I have time I will hunt
through my PC and find the better ones.


Click the banner to see other FO posts!


Friday, 17 June 2011

O is for... Orks!

One thing that is occupying us at the moment is getting the rest of Jamie's 40k Ork army painted. He did a few of the stand-alone models a while ago, but had become disheartened by the prospect of painting unit after unit of the basic Ork soldiers, so the army had been on the back burner. But now we've discovered the absolute joy of lazy painting (using the Army Painter dips and varnishes), he's rediscovered the love for Ork painting. So, since he doesn't have the time to blog about them himself, I thought I'd use my "O" post to share the great work he's done so far!


This Ork Trukk was one of the first vehicles he painted. It was painted with "traditional" painting techniques - layer upon layer of carefully applied colours, washes and highlights. We'll probably have to go back over it once the rest of the army is done, to make sure it looks right alongside the newer additions painted the lazy way. It's also massively dusty, having sat out on a shelf for ages after being finished.


The Big Mek with Shokk Attack Gun was a labour of love. It's a huge model compared to the normal Ork troops, so it will stand out on the battlefield and needs to look awesome. The lightning balls were my contribution to the project. He'll need a matt varnish to match the rest of the army, though, as he's a bit shiny.


This is a Killa Kan. A sort of armoured robot, piloted by a tiny Grot (Space Ork equivalent of a goblin). They go in units of three, but we've not got them all painted yet. I love the grimy stains on the pincers.


These are the basic Ork soldier models. Most of this bunch were painted using the traditional methods used in all the previous models, with the exception of one. You can see the difference in the two close up shots in the bottom right. The bottom model (the one in the hat) is the old style of painting. The one above has been painted the lazy way. With a matt varnish on the old models, you won't be able to tell the difference. I think this picture really captures the unique style of the Ork models - they are so full of character. The detail in the sculpts is incredible, and the kits are so flexible. The two Orks in the top right picture are made from almost identical parts - they have the same legs, body and arms (well, the right arms have different choppas, but are otherwise the same), all that is different is the head and the way they've been positioned. They look completely different. That's the great thing about these Games Workshop model kits. There's so much variation. You can have a whole army of individual models, if you are careful about how you put them together.


These guys are Lootas, with a Mekk (the guy with the pole). These have been painted in the new "lazy" way. The base colours are applied just as carefully, but with far less layers. The skin, for example, is just two layers in two different shades of green, whereas on the older models, you've got at least four or five different colours, applied using careful layering techniques to get the right shading and highlighting. These guys you just paint the basic colours on, then paint the whole model with the Quick Shade varnish. The varnish creates all the shading for you. It's great! All they need is a matt varnish, to take away the shiny-ness. Again, these models have so much character. I love the variety of heads you get. Lightning balls again, my work. I also contribute to the varnishing process, as once the varnish is painted on, a careful eye has to be kept on the models to prevent the varnish pooling in crevices. So while Jamie paints the varnish on, I'm sat, hawkeyed, staring at the models armed with a piece of kitchen towel, mopping up any excess.


Here are some Ork Bikers. Again, painted the lazy way with the Quick Shade varnish. They still need matt varnishing.

We would have done the matt varnishing, but ideally you want to do it outside on a dry day. All we've had this week is rain, so we've not had a chance to finish them off. Even when it hasn't been raining, the air has been too damp and muggy for the varnish to spray on neatly and dry effectively. We don't really have good enough ventilation in the bathroom to do it inside, but if the rain doesn't let off soon, we may have to!

The last thing we need to do to really finish the models off is to paint the bases. Bases are also my job, so I need to find some time to sit down with all the models finished so far and get the bases done. The Orks will probably get bases painted to look like mud.

I'll put up some more pics when they are done!

Wednesday, 8 June 2011

G is for... Games Workshop!

Ah, Games Workshop. What other hobby requires you to be an expert modeller, painter, scenery builder and military tactician? Sure, it’s an expensive hobby, but so is knitting, when you start using the mermaid bumfluff yarn almost exclusively!
My introduction to the world of Games Workshop came when I was at university, with their offshoot board game Bloodbowl. Imagine American football, but with teams made up of orcs, goblins, dwarves or elves instead of men, where beating up your opponents is just as important as scoring touchdowns. As far as monetary outlay goes, it’s by far the cheapest way into the hobby, as a team consists of 16 models maximum. The rules are simple, so it’s really easy to get the hang of it. The tactics involved are not complicated.
A few years ago Jamie and I made a conscious decision to play more Bloodbowl, and we approached the hobby with the usual enthusiasm of people starting something new and exciting. We bought loads of miniatures (not quite every single possible team, but a majority of them) and got painting.

Of course, once we’d been sucked into the Games Workshop world, there was no escape. We soon fell into collecting Warhammer Fantasy armies, and learned the basic rules of their fantasy battle system. We didn’t approach the painting of these armies with quite the same level of enthusiasm, though, as compared to a small Bloodbowl team of sixteen, a horde army with over 150 individual models is quite another challenge! We are slowly getting through them, but we did make the mistake of choosing the three armies with the largest number of models in them – Empire, Orcs and Goblins, and Tomb Kings. We are also now collecting Warriors of Chaos and Daemons of Chaos armies.

Jamie had played Warhammer 40,000 as a kid, so had some models hanging about already, which led to us also starting to collect 40k models too. This is the sci-fi side of things, where the armies are smaller in number, but each model is more intricate as they have crazy power armour and guns, and much bigger vehicles like tanks. So we fell into collecting and painting a few armies for this game, Space Marines, Chaos Space Marines, Tyrannids and Space Orks. So far, I haven’t painted a single 40k miniature, as Jamie has been experimenting with painting and dipping techniques, using my Space Marines as a test army. He’s doing such a good job, I’m going to let him paint the whole lot!

We have also turned our hand to making scenery for the battlefields. So far, we’ve made one hill. But I am part way through a river section, and we have made many extensive plans for other types of scenery, for both the fantasy game and the 40k game.
One day we'll actually get around to playing with it all!
Related Posts Plugin for WordPress, Blogger...