Sunday 29 May 2011

It's almost June!

I can't believe June is almost here. Where has the time gone? I have been looking forward to June, because alongside my usual posts on my projects, I will be challenging myself to a 30 day blogging challenge!


Starting on Wednesday 1st June, I will be blogging my way through the alphabet. Sundays will be my only days off, leaving me exactly 26 days in June to post in. Since I already post an awful lot about my knitting/crocheting/photography, I thought I would use this challenge to write about other subjects, with the loose theme that each of the posts will be about me, or something that I love doing that isn't knitting, crocheting or taking photos. I'm going to try not to bore you all, and I hope you find it interesting to read about some of the things I love and do, that don't usually appear on the blog.

Friday 27 May 2011

A Whistlestop FO tour

Once again, three FOs to share with you this week, but not many photos (thanks to the broken memory card).

I mentioned last week that I had started work on a crocheted Mobius wrap, well, that's finished.


Project: Infinity Wrap
Pattern: Vintage Crossover Mobius Wrap by The Sunroomuk (direct link here)
Yarn: Hayfield Bonus Aran in purple heather (about 1/4 of a ball)
Hook: 8mm

This pattern is great, once you get started. Getting started, though, now that's tricky. The pattern isn't written very clearly at all. It doesn't explain the concept that you should crochet both sides of the chain stitch before joining the round, and instead of describing each subsequent round as one row, it splits it in two! So it says there are 14 rows, when in actual fact there are seven. It just looks like 14 because you've got stitches above and below the foundation chain!

I finally got my head around the concept of a mobius strip, and with the assistance of the lovely Ravellers in this forum thread on the subject, I managed to get my head around the starting chain. Instead of doing a normal chain of stitches, do foundation single crochet. It gives you a much better stitch to crochet into on the underside, and it really helps cement the twist idea. It takes a couple of goes to get the hang of, but the basic idea is you only join once you've gone around both sides of the chain, and you have to twist around 180° to get the twist into the loop. Then, you just do each round in a big loop, and magically you have a piece of fabric with only one edge. I did a few extra rounds to make mine wider.

As I still had a seemingly endless supply of this yarn (which I'm getting pretty fed up of now!), I wanted to find another project which might hopefully use it all up. A friend of mine recently joined Ravelry after picking up some knitting needles, and she'd put a crochet hat pattern in her queue. She happened to mention it was there, so I went to take a look. It was the Brimmed Cap by Lion Brand and it's a free pattern. It calls for aran weight yarn... it was fate, or destiny, or something.


Project: Haaaaaaaaaaaaaaaaat
Pattern: Brimmed Cap by Lion Brand (direct link here)
Yarn: Hayfield Bonus Aran in purple heather (about 1/4 of a ball)
Hook: 6mm

I was incredibly suspicious of this pattern right from the off. Was it going to suit me? Was it even going to fit? The pattern claims it makes a hat sized at just over 18". I measured my head. I'd need a 22" hat. For once, I was going to have to actually pay attention to my gauge! Pattern called for a 5.5mm hook, with 14 sc to 4 inches. I dug out my 6mm hook, and got 12 sc to 4". A quick bit of maths told me this should lead to a 22" circumference for my hat, as there are 66 stitches in the final rounds of the hat.

I got very tired very quickly of having to count stitches for the increases, so resorted to putting stitch markers at each increase point, with a unique marker for the start of the round. This sped things up a lot! It looks massive when you're still in the increase section, but the decreases go a lot faster (stitch markers came in handy here too, although I was struggling to keep my unique marker unique by this point, as I needed far more for the decreases - 11 compared to 6 for the increases). When I finished the main hat part, I tried it on and it felt like it was still a bit too big, so I did an extra round of decreases, meaning my hat ended up with 55 stitches in the band. Not sure how that works, because it still ended up the right size for my head!

The brim was also tricky. The pattern isn't particularly clear, and I wasn't particularly awake when attempting it. I was also watching Iron Man 2, so was a shade distracted (I have a bit of a soft spot for Robert Downey Jr, ever since I saw Chaplin many years ago). It took me a couple of goes to get into my head that when the pattern says continue until the brim measures 2 inches it means how far the brim comes out from the hat, not how wide the brim is when you stop.

It's one of those patterns where you just have to have absolute faith that all will be well once you've finished, no matter how weird it looks inbetween! But I am pleased with the end result, and it seems to look ok on my head so I'm not too worried.

My final piece for today is a very small project, made because I thought perhaps my hat would look odd without any sort of decoration. I had a small amount of the same yarn in brown, left over from my sofa cushions. So I made this:


Project: flower
Pattern: Two-layer Flower to Adorn a Sock Monkey Hat by Shelley Tudor (free Ravelry download)
Yarn: Hayfield Bonus Aran in brown
Hook: 5mm

A nice, quick project. I still need to attach the flower to the hat, but I think I might just attach it to a clip of some kind, to create a removeable decoration that I can wear on hats, or as a brooch, or to pin a shawl together or something.


For more wonderful FOs, head on over to Tami's or Beth's (or both!) and check out the links!

Wednesday 25 May 2011

Wednesday again!

Progress! On my sock!!!


I turned the heel last Wednesday, at roleplay night. I seem to only ever work on this project at roleplay night! Once I'd got my head around the mistakes in the pattern that point you to the wrong stitch marker to start the heel from, it was plain sailing. I've actually done further than this picture shows, as I've worked up a few inches of the ankle now as well.

They are too big for me, but fit Jamie perfectly. So I think they will be his socks. Even though they are pink and purple! I do think I will have a severe case of second sock syndrome though. The half finished one I have from my first attempt (doing it without stitch markers - bad idea) was done with a 4mm hook, but I've used a 3.5mm hook for this one. So I can't just pick that one up and work out where I ought to be with it and carry on. Plus I need to work out how much of the ball of yarn this sock has used up, in case I can squeeze the other sock out of the same ball and save the rest for another project (perhaps another wrap or stole, since my Mum's came out so nice). I think I will have at least one and half balls left over, maybe more. Enough to tackle any number of the shawl patterns in my Ravelry queue!

Not much progress on the others. Haven't touched the filet in a while (it's my other go-to project for roleplay night, you see, so I've been ignoring it in favour of the sock). Still haven't sorted out blocking my Aurora vest, although I plan to do some test motifs using my spare yarn to see which method works best, as I'm still not sure how to approach the 50% acrylic/50% merino blend I used. More on that, when I get around to doing it!

I did start a couple of other projects this week, but they are all finished already, so you'll see those on Friday. I wish I had more exciting progress to report, but between impending exam doom (2 weeks to go!) and the mountain of housework we had to do this week to prepare for new windows (being fitted today), I haven't really had the time to get much done.

For more interesting WIP stories, you know where to go.

Monday 23 May 2011

Almost a photography nightmare

My memory card died this weekend. It's been on its last legs for a while now, but I'd been hoping to keep it working for a bit longer before needing to replace it. I certainly can't cope without one, because of all the photos I have to take, both for my challenges and for my WIPs and FOs!

I was very lucky though, as it died after I managed to take possibly my most exciting photo to date. Two days in and I already have my photo of the week. I'm very excited.

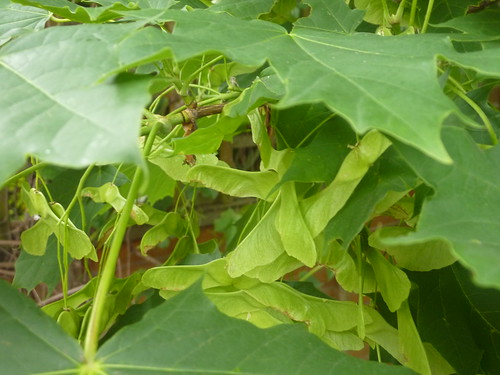
I thought I would share some pictures of my garden. Not because it's particularly well kept, or because I have an exciting Good Life vibe with raised beds filled with veggies and chickens roaming. No, our garden is something at the other end of the scale.


We're in a Victorian terrace (I believe the estate dates back to the 1890s), so to get to our small yard you go down a narrow alleyway. What you see above is what you see as you walk down the alley to the yard, which opens out to the right behind the house. Trying to grow proper garden plants here is impossible, because the entirety of the soil is filled with the roots of this weed. I believe it is cow parsley.

It didn't always look like this of course. When I first moved in, it looked more like this:


Grass and nettles, as well as the cow parsley! One bank holiday weekend, I transformed that into this:


But since then (2007, I think that was) it has been left to itself, and returned to its previous state (minus the nettles, as I dug the soil out and shifted it to the front yard. Now I have a front yard filled with nettles instead!).

The rest of the yard is fairly similar. A square paved area, with more weeds on the other side. When we first moved in it looked like this:


Nettles at least as tall as me! That entire back corner of the garden was completely inaccessible, and the garden behind very often contained two small, noisy and very nosy children. We quickly found a solution to that:


We built a shed. You can just about see to the right my one and only attempt at growing tomatoes. They all died. It was very wet, and they rotted from the ground up. Never mind!

Now, though, nature has reclaimed that side of the yard as well.


More cow parsley!!! It is everywhere. As soon as the flowers appear, so do the bees. Slowly at first, we get a few bumble bees and a few honey bees coming in. Then, as the porcelain berry vine on the fence flowers, more and more bees arrive until there are hundreds of them, buzzing around the flowers. Wasps too, they all come for the porcelain berry flowers. You can hear the hum of them from inside the house. It's incredible.

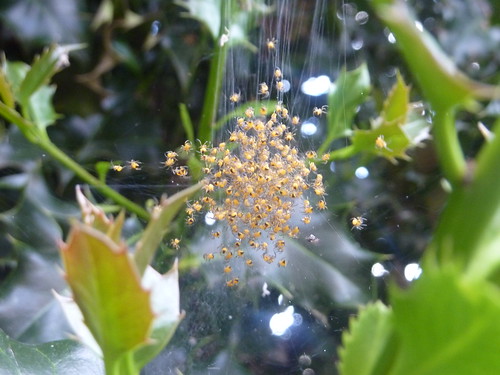
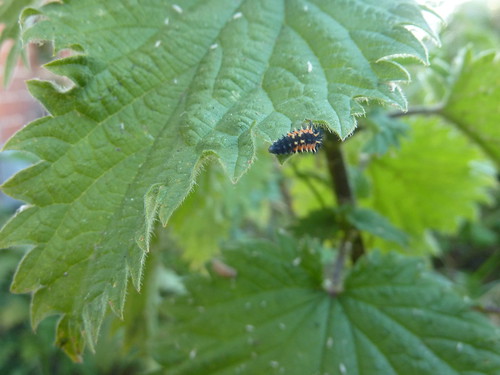
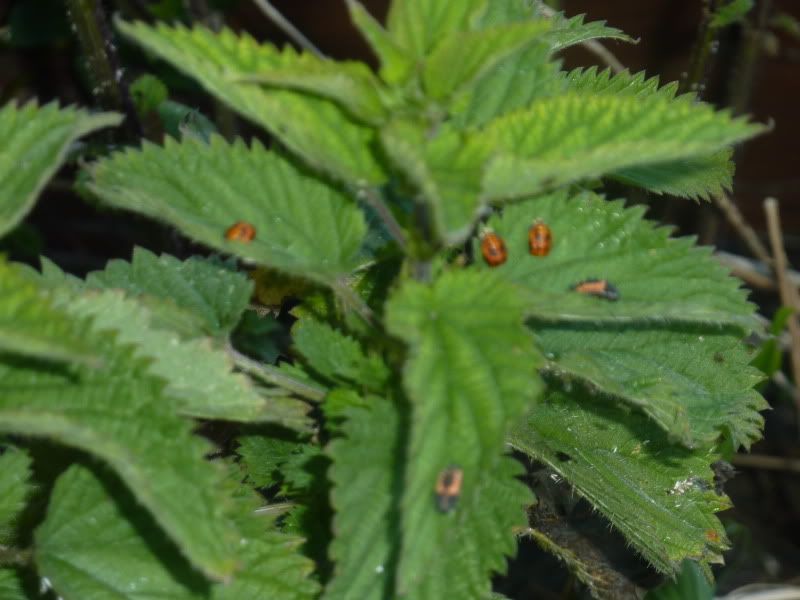
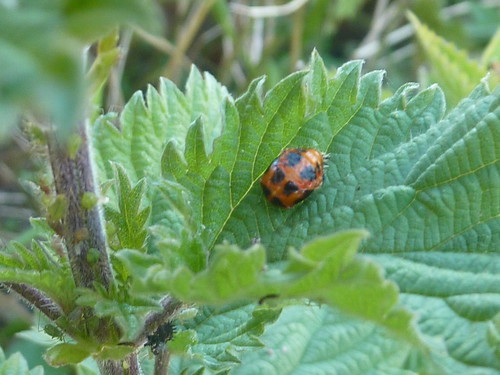
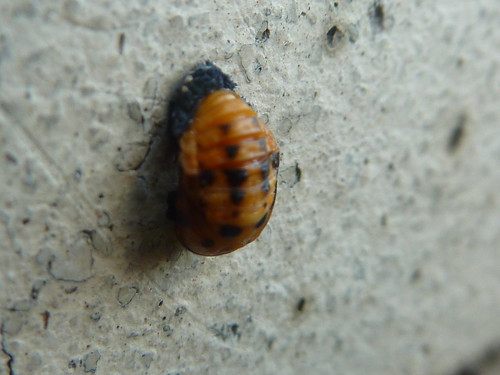
Of course, when you get flies and bees and wasps, you get other creatures too. Spiders, plenty of those. Wolf spiders, house spiders, those ones with the long spindly legs and small round bodies; more recently we've also got wasp spiders and false widows. Being in the south east means we get a lot of the new invasive species showing up (as evidenced by my breeding Harlequin ladybirds in the front yard).

But I wasn't expecting the spider I saw yesterday afternoon.


It's a crab spider! Perfectly camouflaged against the white flowers, this one had caught a bee and was enjoying its lunch. I only saw it because of the bee. I ran inside, grabbed my camera and snapped away.


Isn't it incredible? That's my photo for the week sorted! A little later on, we checked back up on its progress, and the bee had been turned completely around; I guess the spider is really after the abdomen to eat. But by that point my memory card was irreparably damaged and I couldn't take any more photos.

I was interrupted in my spider photography though, by a beautiful blue damselfy.


We don't only have insect life here though. We get plenty of birds, especially when we've got mealworms out on the feeder. We have plenty of slugs and snails, so we also have toads.


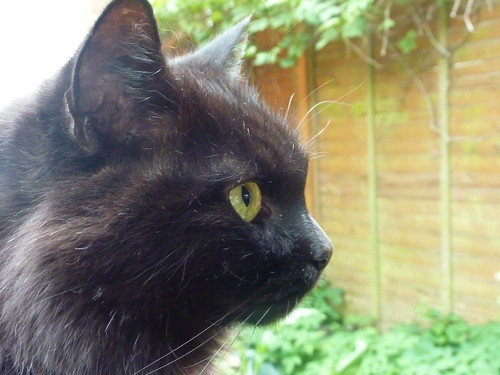
My favourite garden inhabitant though is Mr Popodopolous and his mate.

He's been here at least as long as we have. We know it's the same hedgehog, because each year he's a little bigger than he was the year before. We've already spotted him once or twice so far this spring.

So that's my garden, my fantastic weekly photo sorted, and a new memory card has been purchased and is ready to go. Unfortunately it's failure yesterday means no WIP shots of my latest FO, but I'm sure we can live with that!

Friday 20 May 2011

New pattern available!

I finally got around to writing up and uploading the pattern I created for the mp3 player wrist cuff I made a couple of weeks ago!


The pattern page on Ravelry is here, but if you just want to get your hands on the PDF right away, skip on over to my Free Patterns page, where you will find the direct download links for all my free patterns.

A Bumper Crop

Lots of FOs to share today! Including one project that's been hanging about for ages waiting for me to finish it off. The second pair of Fingerless Lace Gloves is finally done!


Pattern: Afternoon Tea Fingerless Lace gloves by Dora Ohrenstein (direct link here)
Yarn: Patons 100% Cotton 4ply in navy blue
Hook: 2.5mm

As I've mentioned before, the first time I worked up this pair, I realised the mistake in the pattern for working them in the round was far more noticeable in this pair than in my pair made from Patons Fairytale Dreamtime, so I had to work out a better way. Basically, the increase you do for the thumbhole ends up in the wrong place if you follow the directions exactly, so you have to switch the rounds over from left hand to right hand to get the thumb hole above the increase, where it looks neater. So the first glove I did looked wrong, and the second glove I made I missed out a round, so I had to frog both and start over! I'm glad I did though, because they've come out really nicely.

I really like my choice of pearl buttons, although the button holes are a little clumsy. I didn't block the main part of the glove, only the cuffs, as they were a little squashed up and you couldn't see the window pattern properly.


I had to do each section separately, so it took ages! But I'm glad I did it, because the cuffs are so much neater afterwards.

On Wednesday I mentioned I'd started work on some slippers. They were finished pretty quickly, especially once I'd decided to ignore the pattern for the strap, and make up my own.


I have woven the ends in, I just haven't taken another picture of them since!

Pattern: Room Shoes (direct link to English version here)
Yarn: Sirdar Bonus DK in pale blue and yellow
Hook: 5mm

The pattern calls for two strands of DK held together, so I used two different colours to create an interesting variegated effect. This meant the strap pattern wasn't suitable, as it used one strand of DK to make flowers, and I tried it out and didn't like it, as each flower would have to be one colour, not two. So I improvised.

I joined my yarn 12 stitches from the middle of the back, ch18 and joined with a slst to the corresponding 12th st on the opposite side. Slipped into the next unworked side stitch, ch1, turned, did 17 hdc across and joined to the side with a sl st in the next unworked side stitch. Then slst into next unworked side stitch, ch1, turn. hdc2tog, 13hdc, hdc2tog, join to side with sl st in next unworked stitch and fasten off.

I also found some mistakes in the pattern. I was following the large size, but round seven seems to be incorrect as the stitch count just doesn't add up. So I added an extra sc2tog after the (sc2tog, sc) section, and did 25 sc instead of the listed 20 sc to get back to the start of the round. I also added an extra round 8, just plain single crochet, to finish them off properly.

They fit really well, and are just the right amount of warm. I think I might make another pair, this time using the red and purple yarn I've got left.

My last FO for today is a real quick one. Ages ago I bought some really silly novelty yarn on eBay:


with a view to making another scarf like my Marbella scarf. As I only had two balls, not three, I cast on fewer stitches to make a narrower scarf with hopefully enough length.


Pattern: basic stocking stitch scarf
Yarn: random novelty yarn from eBay
Needles: 6mm straights

I cast on six stitches, as it gave me the nicest arrangement of blue pompoms among the white. They kind of ripple up the scarf like a wave, which is really pretty. And of course, it's incredibly snuggly!

For more FOs and fiber arts, head on over to Tami's or Beth's to see what the others have been up to.

Thursday 19 May 2011

Becoming a yarn snob...?

I don't generally expect presents for my birthday anymore, certainly not on the scale you get when you are young. Nowadays it's mostly cash or good wishes! Jamie has promised me yarn, from my list of needs for the year of projects. But since that doesn't start till July, I don't need to order yet. So I had anticipated another month of so of crocheting from my stash (mostly acrylic or acrylic blends).

I was pleasantly surprised, then, when I received an unexpected and most welcome gift from a friend (and fellow knitter) yesterday - a pattern PDF from my Ravelry queue, and three skeins of yarn to make it with.

The pattern is the Tusculum Cowl, which I queued fairly recently after it was mentioned by another local knitter in our Ravelry group forum.

Image copyright Robyn Chachula
Isn't it stunning? Of course, as soon as I saw it I knew I wanted to make it for myself. The suggested yarns are alpaca/silk blends, so I am now the very happy owner of three skeins of Debbie Bliss Andes in a gorgeous purple.


It's so soft! So silky! So... schmooshy! I had to keep getting it out last night to stroke it, and may just have to hold off using it for a little while, just so I can keep on stroking and schmooshing it. Now I know why you lot get so excited about the posh yarn.

I haven't quite reached the stage where I'm just going to rush out and buy it, just to have it sit on my shelf though. But I am a lot more excited about all the yarn I will be getting in July (Knit Picks lace, cashmere blends, even some of the fabled Malabrigo will find its way into my stash), and can't wait to actuallly start crocheting with my Debbie Bliss Andes.

I'm going to save it though, for after my exams. So I won't be 'casting on' until June. That gives me a whole lot of schmooshing time before the yarn transforms into a cowl!


Wednesday 18 May 2011

WIP Wednesday - May 18th

I very nearly didn't have anything to write about today. In previous WIP Wednesday posts I've had plenty to talk about, as at one stage I had ten projects on the go. Now, I've wound down a little and my focus has moved away from crochet (albeit temporarily - once my exams are over it will be back with a vengeance), so I was looking at my projects last night and realised I only had three WIPs, and not much progress to report on any of them!

Ok, so the Aurora Vest is practically finished. All I have left to do is fix the few motif joins where I didn't quite get it right at the start, and then block it somehow. 50% merino, 50% acrylic, I'm still not sure how to go about this one. I think I will try steaming it with the iron, and if that doesn't work I'll just chuck it in the machine and pin it out afterwards.

I finally got around to blocking my second pair of fingerless lace gloves, so they are done (I will show you on Friday). I even dragged my novelty pom pom scarf out of hibernation and finished that off this week.

Which leaves me with my daffodil filet and the crochet socks, neither of which have seen the light of day all week.

Mostly because I was making myself a pair of slippers.


I'm using my leftover acrylic from the granny square, and I wanted a pair of slippers that were a better fit than the hexagon booties I whipped up last week. I hunted through the Ravelry pattern database, and came up with this pattern for "Room shoes", which is a Japanese pattern, handily translated into written only instructions here. As it requires two strands of DK held together, I decided to use two colours, and I really like the effect I got with the blue and yellow together.

Can't really show you more, as they're finished already and it would spoil the fun on Friday. I do think I will make another pair though, in different colours. The red and purple I have might go nicely together as well.

In my panic at only have three WIPs on my project page last night, I started another project. It's a crocheted Moebius wrap which I am making from my leftover stash of Hayfield Bonus Aran, which is 80% acrylic, 20% wool, and a delightful shade of purple. The wrap will co-ordinate nicely with my cabled hat and gloves (and my sofa, but we'll not mention that...). I have to say, it took some getting my head around, as the pattern's original source doesn't really explain properly how you go about setting it up. Thankfully, I'm not the only person who's been scratching their head over it, and the lovely people over on this thread in the Ravelry forums managed to explain things for me.

But I don't have any pictures of it yet. Sorry. The good folks over at Tami's have more pictures of their WIPs. I promise!


Monday 16 May 2011

Happy Birthday to Me!

Bah, stupid Blogger. I scheduled this post to go at 6.40am so it would post up exactly as my new year began, but for some stupid reason best known only to itself, Blogger decided not to bother.

As you might have guessed, today is my birthday. It's never fun to have a birthday fall on a weekday, especially now I'm all grown up and have to be responsible and go to work. Although.... being in work today does mean there have to be cakes (I often wonder where this tradition started, of bringing in cakes on your birthday). So I broke out the baking equipment yesterday and had a go at some new recipes.

First up, the Chocolate Crispy Cakes. The recipe is from the BBC Food website, and can be found here. It's a bit of a misnomer, since they're not really cake, but as soon as I saw the list of ingredients included 5 Mars Bars, I knew I had to make them!

Only four ingredients? Can't be that tricky.

There's something very satisfying about
slicing up Mars bars with a big knife.
Melting the Mars bars with butter.

In with the "other puffed rice cereal".

Leave to cool.
Finally, decorate with melted chocolate.
This has to be the simplest sweet treat I've ever made. Although I think the recipe is a bit optimistic, expecting you to get 75g of melted chocolate on the top as decoration. As you can see, I only used about half the chocolate that I'd melted, leaving me to eat the rest with a spoon.

I also had a go at making a Chocolate Marble Cake. The recipe I used for this, I found on the BBC Good Food website (not sure why the BBC needs two different food websites, but there you go) and can be found here. I've wanted to make a marble cake since I was very young; my Mum had a load of really old cookbooks, Readers Digest ones I think they were, and one of them was all cakes. There was a marble cake recipe in that, and every time we were going to bake anything, I wanted to do the marble cake. I don't know why we never did, aside from not having a loaf tin I can't think of a reason why not. Sometimes I guess parents decide things without good reason!

So, while I was in the supermarket picking up the ingredients for the Crispy Cakes, I picked up a loaf tin. I failed utterly to take photos of the cake pre-oven, because I was in a bit of a rush to get it done so we could make dinner. But here it is in all its glory afterwards!


I was SO PROUD of myself. Sure, it's a little burned on the outside edge, but my oven is incredibly enthusiastic, so I'm amazed it wasn't even more burned! But the cake itself is so light and airy, it has to rank right up there as one of the best cakes I've ever made. And I've made a lot of cakes. Just need more practice in getting the marble effect to look even prettier.


The rice crispy squares are so far proving extremely popular with my colleagues!

Friday 13 May 2011

Friday Photography

After failing last week to get a photo in time, I left myself with only five days to get this week's picture. Fortunately, both our front and rear gardens provide lots of opportunity for great shots, thanks to letting them run wild and allowing all manner of creatures free reign.

First, we spotted a ball of spiderlings, recently hatched, on a rather intricate three-dimensional web in the holly bush.

Spiderlings 1


When we first saw them, they were huddled up in a perfectly round sphere, right in the centre of the web. I blew gently on them and they fanned out across the threads. I took this while they were scurrying back to form the ball again.

Then, the next day, I was taking the recycling out, and I spotted life in the front yard! This is something of a rare spot, as the front is a boring paved square covered over with a mound of nettle-filled earth I dug out of the back garden a couple of years ago. I had intended to dispose of it altogether, but it was a very hot weekend so the soil only got as far as the front yard. Where the nettles have thrived!

Ladybird 6


I spotted this little fellow as I was closing the wheelie bin... what on earth could it be? I took a closer look...


They were everywhere I looked. Some still in the caterpillar-like larval stage, some in the middle of the changing pupal stage. Very carefully, I tried to get a closer look without stinging myself.

Ladybird 5

They're ladybirds! I've never seen ladybird larvae and pupae before. I was very excited. I had no idea what species they were, so I hunted around until I found an adult.

Ladybird 4

It's a Harlequin Ladybird, which a quick Googling has informed me is an incredibly aggressive, invasive species which is rapidly spreading across the UK and potentially endangering our native ladybird species. Check out this website for more info, identification guides and the ability to report sightings so they can track the spread. I have reported mine.

Bad for the environment or not, they certainly provided me with plenty of options for a photo of the week! And here it is, in all its glory:

Ladybird 2

Can you believe it, they are even pupating (is that a word?) on the wall of my house!

Wednesday 11 May 2011

Of making things.

I haven't really done anything worthy of reporting on my remaining WIPs. I failed to sort out blocking my gloves and vest at the weekend, and at most have managed a few extra rounds on my sock.

Not to say I haven't been busy though! In amongst everything, I found time to make a few things.

Like these cheese scones:

Scones

Jamie made me put far more cheese in than the recipe suggested, but it was worth it, as they were delicious. I'd have preferred fruit scones, but had no sultanas in the cupboard.

I also crocheted some booties. Not baby booties, but full size adult ones!


The yarn colour disguises the pattern somewhat, they are Hexagon Boot Slippers, made by joining three large hexagons and attaching to a rectangular sole. They're too big for me, but as you can see, they fit Jamie better! Rather saggy around the heel, but I think this is a fault of the overly simple construction. They'd look awesome with multiple solid colours. I might be tempted to try again, maybe with the bright coloured DK I've got hanging around. See if I can't modify it to fit better.

The last thing I made this weekend was a wrist cuff to hold my mp3 player. We've started running again, now the evenings are lighter and the weather is more amenable. But my tiny mp3 I take running no longer clips to my clothes, as I broke my case.


You can see how tiny it is! I improvised a design, taking inspiration from the few free mp3 cuff crochet patterns I could find on Ravelry.


It fits very neatly in the pouch, and is nice and snug on my wrist.


Sadly I didn't take any photos of it during construction, nor did I make any notes of what I did. But it wasn't tricky. If I can find the time, I will try and write it out properly.

Taking it out for a test drive tonight!

Monday 9 May 2011

Photo failure

I knew this day would come. 18 weeks into my 52 week photo challenge, and I don't have a photo for the week.

Between the Royal Wedding, May Day bank holiday weekend (I knew I should have taken my camera to the beer festival!) and coming back to work after my long break, I managed to take very few photos at all. In fact, the only shots I've taken have been project photos for the blog/Ravelry, which don't usually fulfil my criteria for being "good enough to upload to Flickr".

So I've had to cheat slightly, and extend week 18 by a couple of days, so photos I rushed out to take yesterday will count!

I took advantage of a break in the clouds (it has been alternately raining very heavily and sunny here all weekend) to take some shots in the garden, with Mr Fidget's able assistance:


Surveying

Distracted

I just love how these shots really highlight the changes in his fur colour. His face is still black, but his flanks have tanned to a lovely shade of brown, since he's been sleeping out in the sun, and the white hairs in his beard are really showing.
Sycamore seeds

I am always surprised by how early sycamore seeds appear on the tree. They won't ripen for months, but here they are already.
Porcelain Berry Vine flowers

Our battle with the porcelain berry vine continues - the rain from the weekend has caused a massive growth spurt; trailing stems are now reaching the house, so we need to do some drastic cutting back before it takes over the alleyway! It's starting to flower though, so hopefully the worst of the growth is over.

Stare 2

This is the shot I've gone for as photo of the week. He heard a noise over by the fence where the other cats come in, and was so focused on it, even though there was nothing there.
Related Posts Plugin for WordPress, Blogger...