Friday 29 April 2011

Sanity returns..

But I survived, and I know it was only a dream.
H.P. Lovecraft, Under the Pyramids, 1924

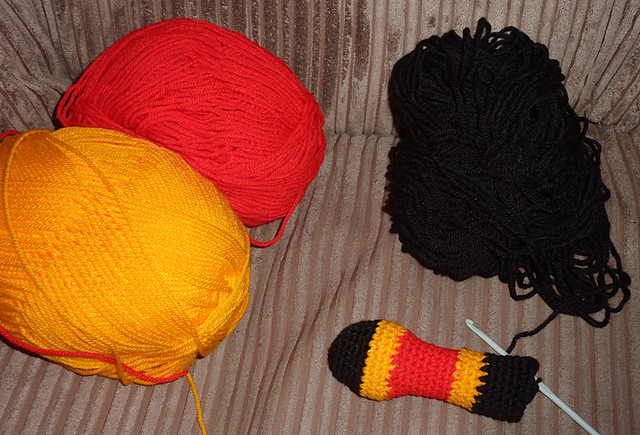
About a month ago I began working on the Cthulhu Beard Hat for Jamie. As previously documented, this project drove me to the very edge of my sanity. After frogging and re-starting about four times, trying out different hooks, stitch counts and a variety of changes to the pattern, I finally discovered a way to make it work.

On Friday last week I sat down in the house alone, determined to make some progress on it once and for all. With Pride and Prejudice on in the background to help keep me sane, I tackled it once more. Using the recommended 5mm hook had come up way to small, increasing the hook to a 6mm didn't really help either, it was still coming out tiny. I had investigated other hats and their construction, which led me to try a base ring of 8 stitches instead of 6. None of these worked. Taking one final chance, I upped my hook to 8mm, and used two strands of the Sirdar Supersoft Aran held together.

Now it came out too big! Without Jamie's head available to measure against, I had to guess, using other hats he owns and deciding how much bigger than my head they were. It was a bit hit-and-miss, but eventually I got the right size by removing rounds 11 and 12, only increasing to 60 stitches.


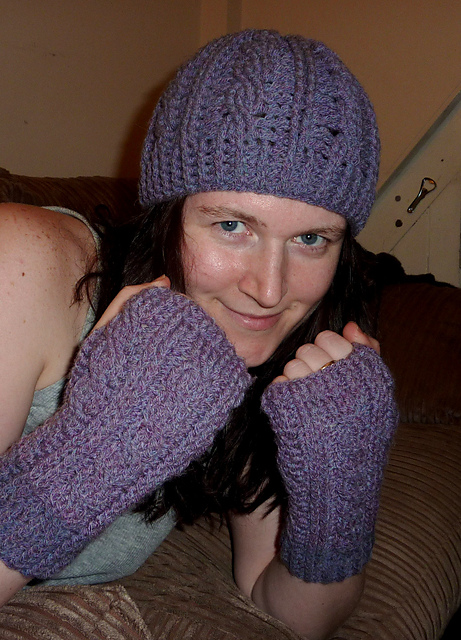
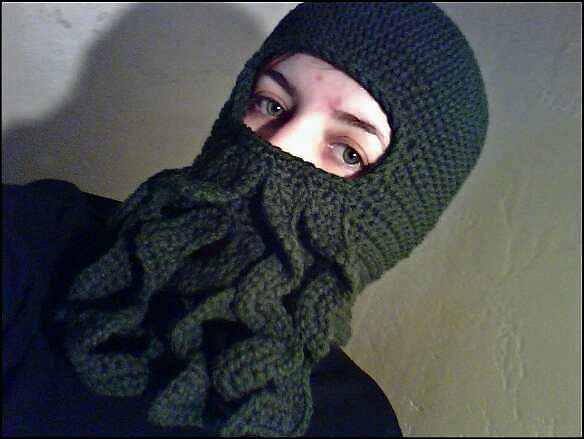
I followed the rest of the pattern pretty much exactly, although I had to keep putting it on and taking photos of myself to check how it looked.


I did stop following the pattern once I'd finished round 35 (technically 33 for me, since I'd missed out two rounds earlier on), so didn't do the extra rows for the sort of skirty bit that goes over the back of the neck. I thought it would look weird.

I didn't fasten off though, and waited for Jamie to come home so I could check it fitted properly. Which it did. Once I'd fastened off and weaved in my ends, I did a round of single crochet around the eyehole, to make it more sturdy and look more finished.


Then it was on to the tentacles! They were pretty easy to get the hang of, although there is an awful lot of counting stitches required.


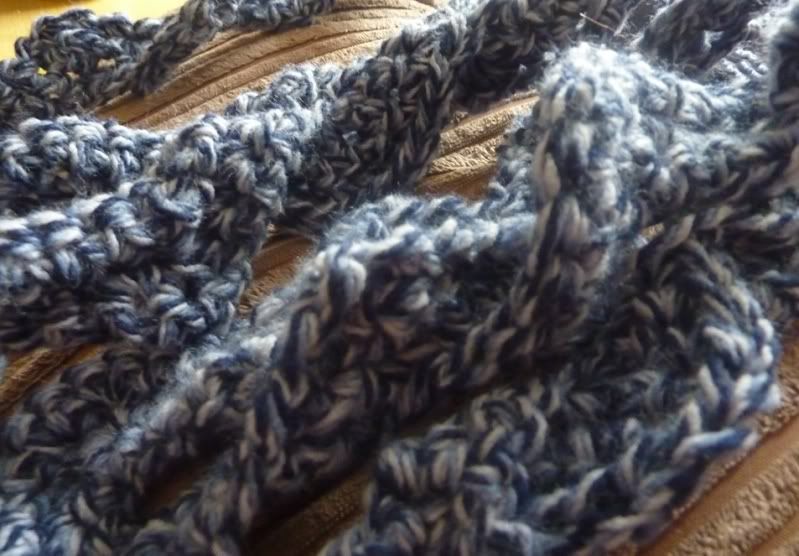
I love how they twist and curl. It's very clever.

Finishing off is just a simple matter of sewing the tentacles to the hat using the yarn ends. I did it while watching Star Trek: Voyager. Here's the finished hat:


and here it is being worn by Jamie for the first time:


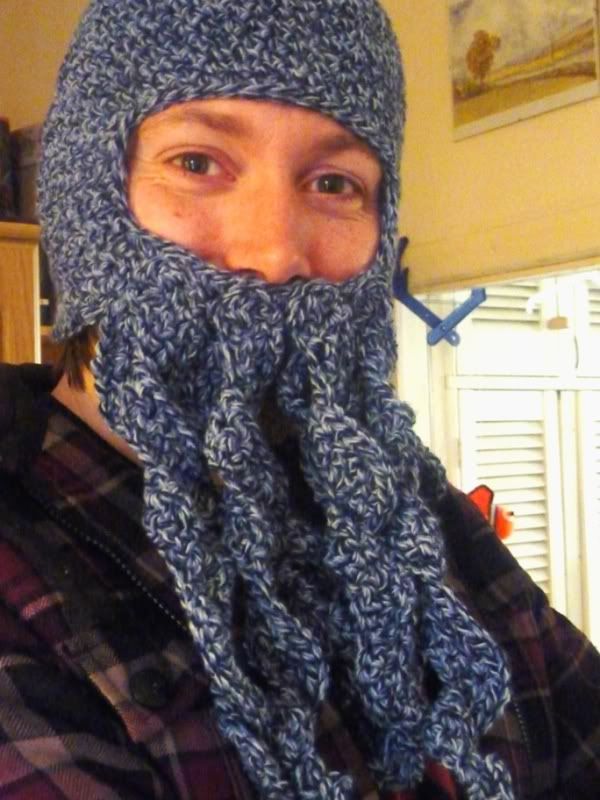
So there you have it. Cthulhu Beard Hat. I've had quite a few people asking me why I've made it. Why wouldn't you? It's awesome.


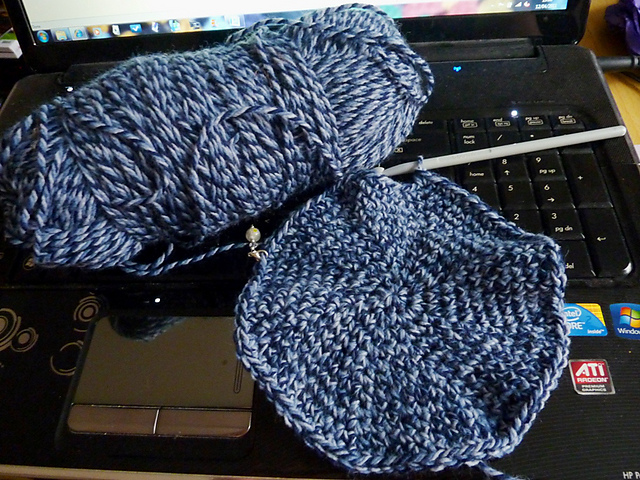
I have one other FO today, another project which almost led to my brain melting out of my ears. Unlike the hat, this one was sanity-draining because it got so dull. I actually finished it off 5 rounds early, because I just couldn't be bothered with those dc clusters anymore.

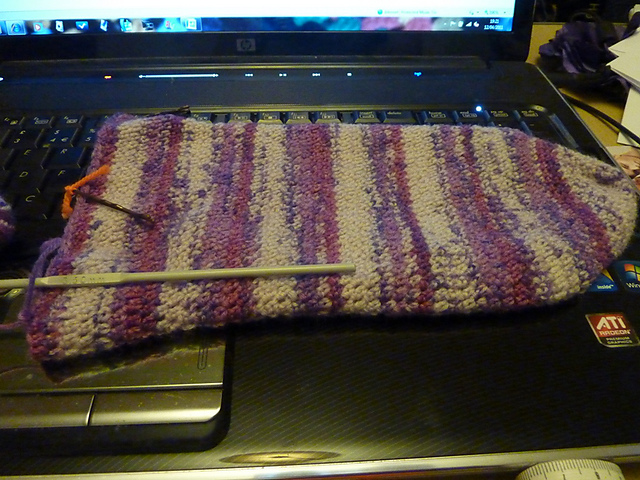
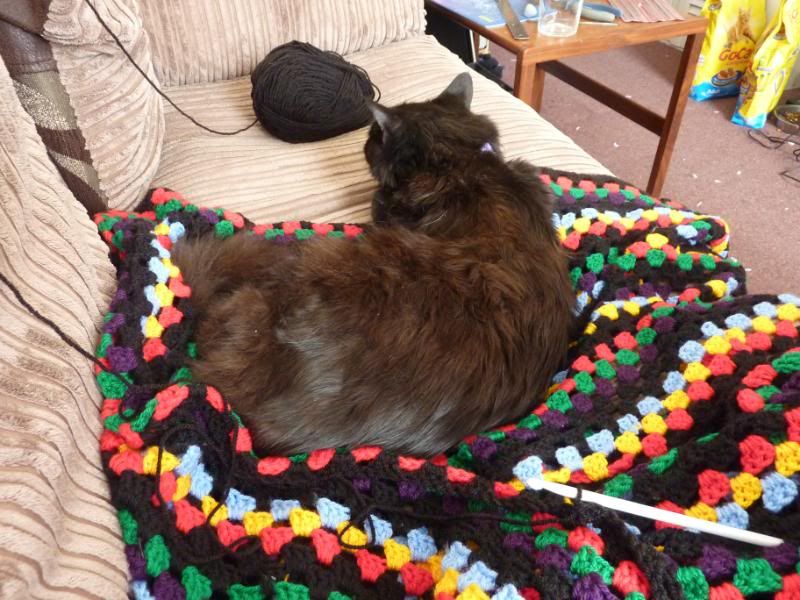
It's the round baby blanket!


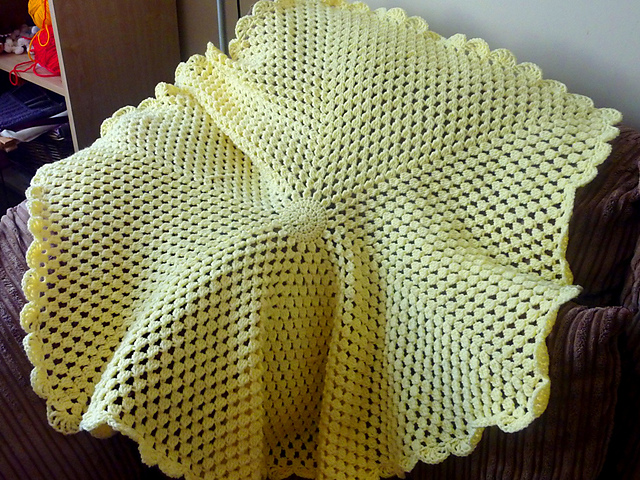
All of the details are on the project page on Ravelry, should you be so inclined. The finished blanket is very sweet, but my god it's a boring pattern. I won't be making another one! Although I think if you did it in stripes, so had the added interest of changing colours every few rounds, that might make it a bit more interesting.

As it's Friday, don't forget to head on over to Tami's and Beth's link parties and see what else everyone is up to!


Wednesday 27 April 2011

Easter catchup

I hope everyone had a fabulous Easter weekend! The weather was fantastic here in the UK. Gorgeous sunshine, perhaps a little too hot for my tastes, but somehow I escaped the weekend with no sunburn (something of a miracle for my pasty white skin).

I had the house to myself all weekend, as Jamie was off at the first major LRP event of the year. On Good Friday I managed to get out and about to take photographs in the sun. I had planned to spend the rest of the weekend at home, tidying up and getting on with some revision for my exams, but I was viciously kidnapped by my Northampton friends, and dragged off for a barbecue.

Ok, I might be exaggerating. I kidnapped myself, really.


First Spring Ducklings
First spring ducklings on the river. There were nine in all, but they wouldn't stay still
long enough for me to get them all in shot!

I had hoped to get a fair bit of crocheting done on the train, but the train was so busy I didn't really achieve much. Just a few more rows on the daffodil filet panel, although I did try in vain to get my head back around the crocheted socks. Most of my kirby grip stitch markers had fallen out, so it was tricky to work out where I was and what I was meant to be doing! I think I need to sit down quietly with this one, without any distractions, and work out what is going on.

The barbecue itself was lovely and relaxing. It was nice to see so many friends I hadn't seen in a while.

The pool was a welcome relief from the heat!
I got even less crochet done on the journey home than I'd done on the way there, mostly thanks to my raging hangover.

I have emerged, however, from the Easter weekend having completed two of my outstanding WIPs - I have finally defeated the Cthulhu Beard hat and it is now sat waiting it's reveal on Friday. Here's a teaser:

Tentacles!!!!
The other finished project is the round baby blanket for my friend's July baby. Now it's finished, I'm a little underwhelmed by it, so have immediately launched into a second project to gift alongside it.


It's the Tree of Life afghan pattern from Lion Brand - the crochet version! I'm not doing a full afghan, instead I've decided to do one panel of the tree chart and use it as the front of a cushion for the baby. I'm using the same yarn as the round baby blanket (my seemingly unending supply of James C Brett Top Value DK). So far, it's going well, although I am very glad the pattern has both written and charted instructions.

Check out the usual WIP Wednesday link ups to see what everyone else has been up to over Easter!


Friday 22 April 2011

Photography Friday!

I've talked before about the massive inspiration my Gran is to me, in my painting, knitting and crochet. The photography, though, that's Granddad. One of the few things I know about him is that he was a keen amateur photographer. A lot of my baby photos are beautiful black and white images which he took, and developed himself. So it is fitting that today, on Good Friday, I have some cracking photos to share from my trips out into the sun today.

I started in the garden this morning.
Holly flowers 1

Branch

Dandelion Seeds 1

I had to come back inside after about five minutes, though, it was far too hot! I hid indoors from the sun through the hottest part of the day, watching the BBC adaptation of Pride and Prejudice and crocheting my fingers to the bone, finally making progress on Ye Liveliest Awefullness. I eventually ventured back out again at about five pm.

I live quite close to the River Thames, so I went for a walk down the Thames path, through Thames Valley Park. There were plenty of people out enjoying the sun, lots of barbecues on the go, children playing, dogs everywhere and so many boats on the river. I didn't really take many shots including the people, I don't feel particularly comfortable photographing strangers! So I stuck to artful nature shots.

Sunlight on the Thames

Trees on the Thames

Crossing

I managed about an hour out in the sun, but have since been squirrelled away in the living room. Rather depressingly, despite the evening being sunny and bright, I've had to turn the lights on and close the blind! I feel like a traitor to the weather, but we have no natural light at all in the front of the house of an evening, and I need to see my crochet! I'm working on the round baby blanket tonight, hopefully will finish it before too long.

A Good FO Friday

Today is Good Friday. Good for a number of reasons. Good because today is the start of my 12 days off work. I don't go back till 4th May! Good because the weather is stunning here in the south of England at the moment. Good because I finally finished my cabled fingerless gloves!

However, there is always a tinge of sadness on Good Friday for me. When I was a baby, not even a year old, my grandfather suffered a heart attack while driving through Bradford city centre. Fortunately, Gran was in the passenger seat and was able to bring the car under control and stop it safely without causing an accident, but Grandad went to hospital and never came home again. He died on 20th April. It was Good Friday.

Not long after I'd been born. He looks a bit scared of me, I think!

Taken a few weeks before he died
It's funny, because I never really knew him at all. But I still miss him, all the same.

****

Anyway, enough of that. On to the finished projects! I have finished my granny rectangle, of course, but I am home alone this weekend and am unable to take a decent photo of myself using it, so I don't have a new picture to share. It looks pretty much like it did in the last photo, just without the ends dangling!

But what you're really interested in is the gloves, I can tell. With the house to myself yesterday evening, I was determined to get them finished. I put on a film (Julia & Julie, if you were wondering. I enjoyed it, but it wasn't as good as I was expecting) and got out my tapestry needle to weave in all those ends. If I was making these gloves again, I would do them differently, just to avoid all the ends it creates.

So, without further ado:

Tadaaaaaa!

Pattern: Cabled Crochet Fingerless Gloves by Sarah Hoyte (Rav page here)
Yarn: Hayfield Bonus Aran in purple heather (just under 100g in total)
Hook: 4mm

Notes & Mods: The pattern I used for these gloves is based on a free hat pattern. When I started these gloves, I'd never done cables before, but was referred back to the hat pattern, as there is a handy photo-tutorial on doing cables in crochet. Of course, that's when I got the idea for doing a whole matching set; hat, gloves and scarf.

I realise now, if I'd made the hat first, I'd have been better prepared for the gloves. If I'd explored the internet further, I'd have realised that it is possible to work these cables flat, as well as in the round. This would have saved me a lot of end-weaving, as instead of finishing off each round and starting again on each side of the thumbhole, I could have just turned my work and kept on going. Lesson learned, do it properly next time! It's easy enough, just do bptr instead of fptr when doing the cable twist bits.

I originally did 5 twists in my cables, before finishing off with the rib cuff, as I was running out of yarn. This left them a little uncomfortably short. So I got more yarn, ripped back my cuff and added an extra two twists of cable. Those six rows make a lot of difference! As mentioned on Wednesday, my new yarn is a different dyelot to the original, so my cuffs are a lot darker!

I didn't like the way the thumbhole was massive. I felt my thumb would get too cold. So I had a bit of a think, and decided all I really needed was a sort of shaped flap that would cover the fat, fleshy part of the thumb, but leave me with a full range of motion. I didn't want the restricton of a thumb "tube". It's literally a few rows, worked back and forth, starting in the bottom of the thumb hole. It goes something like this:

with right side of glove facing, attach yarn with slip stitch to the bottom of the right edge of the thumbhole.
R1: sc, hdc, sc, slipstitch in left side twice
R2: ch 1, turn, sc, hdc, bpdc in hdc of R1, hdc, sc, slipstitch in right side twice
R3: ch 1, turn, sc, hdc, hdc, fpdc in bpdc of R2, hdc, hdc, dc, slipstitch in left side twice
R4: ch 1, turn, sc, hdc, dc, bptr in fpdc of R3, dc, hdc, sc, slipstitch in right side, fasten off.

So there you have it. Matching gloves and hat. All I need now is a matching scarf or cowl. No pattern that suits on Ravelry so far, so I'll have to make one up. I've had a few ideas, done a few test swatches. But I'm going to wait till autumn to work it out, I can't be making warm snuggly scarves in the middle of summer!


This post is part of Tami's FO Friday and Beth's Fibers on Friday. Go check them out!

Wednesday 20 April 2011

WIP Wednesday - April 20

Well, as promised on Monday, progress photos for some of my more neglected projects!

I know a fair number of people are quite looking forward to seeing this vest finished (both on- and offline), so just for you, here's some pictures of how it looks today:

From the front...

...and the back.
You can see how long it's getting now. I'm currently working on the C motifs, which make up the bulk of the bottom half. I've got four more C motifs on my current row, then another six underneath, before I move onto the edge squares, the D and E motifs. In total, I've got 26 motifs left to make. I've just started another ball of yarn, including this one I've got three left, plus some bits. Hopefully I'm still on target to finish before I run out!

I know, I've been a bit lazy with weaving in the ends. The pattern recommends you do each motif as you finish it, because then when you get to the end you're done! But last night I was rushing to get another row done, and decided to abandon end weaving in and save time. I think, unlike my Avalon top, I will block this one before I wear it, so that will be an experience!


As I said on Monday, I've finally got round to working some more on the fingerless cabled mitts. On Sunday morning we relaxed in front of the TV (a rather thought provoking documentary about the nature reserve that has sprung up in the irradiated zone around the Chernobyl nuclear facility), I plucked up my courage and started weaving in ends on the first glove.


So I ripped back the four rounds of ribbing, and got on with more cables! An extra two repeats of the cable pattern, to be precise, before adding back the four rounds of ribbing for the cuff. I also experimented with the thumb hole. If you recall, they look like this:


I'm not going to show you what I've done though, because I'm saving that for my FO post! But it's not a full thumb, I don't think they need that.

I'm sure you've noticed by now, in the first shot above, the horrendous clashing of dye lots!


The original glove is paler and pinker than my new ball. Ultimately, I don't think it matters, because the gloves will match perfectly with each other, and the slightly darker yarn looks like it's almost intentional, as it makes up the cuff and the thumb. It's a design feature, daaahling.


He's coming along nicely. I love this project as it's so simple. Getting the fiddly bit out of the way first (the head) means now all I have to worry about is colour changes, which are easy enough. The pattern could be written better, but it's so simple that's not really an issue. I've got six more repeats for the body and the tail decreasing to do, so it will be a while yet I think, before this is done. He's my "I can't be bothered to work on anything complicated" project, along with the round baby blanket.

So that's my WIPs this week, head on over to Tami's Amis and Ambassador Crochet  to see what else folks are working on.


Monday 18 April 2011

Unintentionally quiet

I realised this morning I haven't posted since my WIP Wednesday update last week. I've been so busy, between work and studying, that I've hardly had time to myself to craft, photograph or blog! I had planned to get at least two WIPs finished in time for FO Friday last week, but I was unexpectedly dragged out (kicking and screaming, I can assure you...) for curry and wine on Thursday evening, so didn't have a chance to get anything done.

I've finally finished my ACCA courses for this session, with the final two days of Advanced Taxation neatly sandwiching the last working week (day four was on Sunday last weekend, day five was on Saturday just gone). This does mean I've effectively done a 7 day week, which was very tiring. I only had Sunday to relax and recover, before this week started again! Luckily, it's Easter this weekend, so only a four day week in work, and then I'm off for 12 whole days. There will be much crafting and blogging about crafting in the next two weeks!

I did get quite busy yesterday though, and have made a fair amount of progress on things. I still haven't quite finished my second pair of Afternoon Tea Fingerless Gloves, but all they need is ends weaving in and blocking, as I managed to get the pearl buttons crocheted on last week. I've added a fair number of rounds to my Coral snake; my new stitch markers are very handy on this project, as I'm using them to keep track of how many rounds I've done for each colour (so much easier than a row/stitch counter). I've woven in the ends on the Rectangular Granny and it is now officially finished. There may be new photos of it on Friday, if I don't have anything else to show off!

One effort from yesterday I am very pleased with, though; I picked up the Aurora Vest again and worked a few more motifs (six, in fact). I'd forgotten how simple this project was! The only problem is I've only got one 4mm hook, which is currently required for this vest and the coral snake and my cabled levelling up gloves, so they have to share. Speaking of the Levelling Up Gloves, I finally got over my fear of weaving in all the ends, and got on with it yesterday morning. One glove is now finished! So there's plenty of exciting progress to photograph tonight to go up on Wednesday.

I've also powered through the Round Baby Blanket. It's a great project for not paying attention to while I do something else - in yesterday's case, the something else was watching Monsters, a very low budget British sci-fi/drama film about two civilians trying to get back to America through an area of Mexico quarantined due to infection by extra-terrestrial life forms. The film was excellent, and I am now only about 8 rounds away from finishing the blanket.

Of course, there had to be downsides to being so busy last week. My 52 Week photography challenge suffered; I had no time to take pictures, the weather turned rubbish towards the end of the week, and I completely forgot about it. So I don't have many pictures to choose from - mostly a variety of shots of the cat sleeping on the granny rectangle that I took to illustrate my post last week. Hopefully one of those shots will be Flickr-worthy, and can count as my photo of the week.


Wednesday 13 April 2011

WIP Wednesday - April 13

Another week, another WIP Wednesday round up! As usual, most of my crocheting energy from the weekend went on small, quick to finish projects like the bee and not on my ongoing WIPs! So I’m not sure how much progress there is to share. Lets take it one WIP at a time, and see how we go.
Rectangular Granny
I talked about this a fair bit at the weekend, so don’t have more to add today. I haven’t woven in my ends yet. But here’s another gratuitous project photo:
Crochet Socks
Well, these have been on the back burner for a while now. I’ve finally got around to taking a more up to date photograph:
I’ve been waiting for my new stitch markers to arrive – I won four more sets on eBay, so I can now carry on with this one. I think this will be my go-to portable project for the foreseeable future.
Aurora Vest Cardigan
Has been shamefully ignored. I guess I’ve not been in a small square motif sort of place. Although, of all my WIPs, this is the one my work colleagues are most excited about, having seen the photos so far. Maybe I’ll pick this one up again this week.
Afternoon Tea Fingerless Gloves 2
Are still awaiting buttons. After the success of doing the buttons on the first pair at role-play night, I may take these along this evening and get them finished. Then they can go on the blocking board when I come home, and hopefully be finished to share on Friday.
Wand’ring Lonely
I’ve been doing the odd row here and there, but it hasn’t really developed much so far. I’ve hit the base of the daffodils in the middle now, so it needs a touch more concentration to work on. Another good portable project though. Might take this one next time I go to knitting group.
Levelling up gloves
These haven’t changed. Ends still not woven in. I haven’t made a thumb. All this nice sunny weather hasn’t encouraged me to work on my really warm woollen mittens!
Round Baby Blanket
Chugging along nicely. I have discovered that its intended recipient is a boy, but that’s ok, because the blanket is fairly neutral in both style and colour. I also have less time than I thought (I must have miscounted the months) as it’s a July due date. Never mind, it will still be finished well before it’s needed.
And just for fun, introducing two new projects to my WIP Wednesday roundup:
Ye Liveliest Awfulness
I blogged about this project yesterday, so can’t really say I’ve added much to it since then!
Aaargh! Snake!
An amigurumi coral snake, which has been sat in my project queue on Ravelry since Jamie saw it back in October and said “That’s awesome, you should make that”. I’m using yarn left over from the Granny Rectangle. So far, it looks like this:
I’m not using safety eyes because I don’t have any, so I will have to fudge them when the time comes. I think this snake is going to live wrapped around my dragon tree, George, as the living room is rapidly filling up with amigurumi and I need to expand my horizons a bit.

Don't forget, this post is part of WIP Wednesday, so head over to Tami's blog to see what else people are up to this week!

Tuesday 12 April 2011

Ye Liveliest Awfulness

Certainely, there was Noth’g but ye liveliest Awfulness in that which H. rais’d upp from What he cou’d gather onlie a part of.
H. P. Lovecraft, The Case of Charles Dexter Ward, 1927
My latest WIP is a present for my boyfriend. He is (indeed, we both are) rather fond of the Cthulhu Mythos, in particular sharing a love of the board game Arkham Horror, and the occasional desire to run/play in a game of Call of Cthulhu. So naturally, when I’ve been scouring the Ravelry pattern database, I’ve been adding all manner of Cthulhu themed projects to my queue.
I’ve done a lot of projects for other people lately, what with all the baby gifts, and a fair amount of selfish crocheting too. Jamie’s had to put up with my mess, my self-absorption in my projects and the sheer amount of my time Knitting & Crochet Blog week took up. Various busyness has meant we’ve not spent much time together in the last couple of weeks as well, so the poor boy must be feeling a tad neglected!
What better way to make up for it, than by making him his very own Cthulhu balaclava!
Photo by swingkitty007

Isn’t it awesome? It looks great in the pattern photo. However, once you start to delve into the projects, it quickly becomes clear that this is no easy make. It seems that using the yarn and hook in the pattern, you end up with a teeny tiny hat, not the fabulous FO as demonstrated by the designer.
My problems began with yarn choice. I used the Ravelry yarn database to find a suitable alternative to the suggested Bernat Berella 4 Solids & Ragg, as I wasn’t sure if I’d be able to get my hands on the Bernat for a decent price. I used the gauge listed on its Ravelry page of 18 – 20 sts = 4” and looked for alternatives. For the most part, I’ve found that worsted and aran can be interchanged, so was pleased to find Sirdar Supersoft Aran came up in my search at 18 – 19 sts = 4”, with the same recommended hook size, same material (they are both acrylic).
So I got Jamie to choose a colour, went off and bought it, and set to work.
I know, you'd think it ought to be green...
Argh! This is where my troubles started. I’m on my third iteration of the hat as it stands. Even with a larger hook (I’m using a 6mm, not the recommended 5mm) it’s coming up way to small for Jamie’s head. Too small even for me, I think. Looking at it again, I can see that although the two yarns I’ve mentioned have the same stitch gauge, that can’t possibly be the case, as 100g of the Bernat gives you 195 yards, but the same weight of the Sirdar is 258 yards. Clearly, then, the Bernat is a heavier weight than the Sirder, despite having the same gauge. I didn’t think this was possible? Surely you’ll get less stitches with the Bernat, using the same size hook?
I'm still not convinced this is working.
I’m currently experimenting with an alternate basic pattern for the hat part, stealing ideas from various crochet beanie patterns I’ve found that use sc stitches. So I’m now testing out using a base ring of 8 stitches, not 6. Hopefully this will result in a larger hat. If not, I guess I can try doubling the yarn and going up to a slightly larger hook again? (I’ve seen 6.5mm touted as being the magic number for this pattern).
But it’s driving me up the wall. I can feel my sanity dribbling out of my ears the further along on this project I go.
Almost as if I had truly seen a glimpse of ye liveliest Awfulness.

Monday 11 April 2011

Bees!


The nice sunny weather brought out this little fella yesterday. He found himself a cosy spot with the only flowers in the garden.

Pattern: Bazzil the Buzzing Bumblebee by Amy Dianna
Yarn: Sirdar Bonus DK (yellow and black left over from the Granny Rectangle, white left over from the Tiger Stripe Starghan)
Hook: 3.5mm

I made the eyes by attaching some black yarn where I wanted the first eye, then I did a chain and a single crochet in the same spot, before pulling my yarn through to tie the stitch off. Then I used a tapestry needle to thread the yarn through the head to the other side, and repeated the process for the other eye. Then, without cutting the yarn, I thread it back into the head and out to make the mouth. For the antennae, I chained seven or eight stitches (can't remember!), and pulled the yarn through, leaving a long-ish tail. Then I threaded the chain through the top of the head till it was halfway through, then arranged them to face in the right direction and trimmed the ends till they looked about right.

When I have more spare time, I'll make him some friends.

Sunday 10 April 2011

My never-ending blanket

I've been working on my Granny Rectangle blanket since Christmas Day. Over three months ago, and the damned thing still isn't finished. My main problem hasn't been a lack of willingness on my part, I like working on it because it's so simple. The bigger it gets, the nicer it is to snuggle up underneath it while I work on it. Unfortunately, I'm not the only one who thinks this!

He may be cute, but he's incredibly annoying!

Every time I get this project out now, the cat appears and settles in. He's got a knack for sitting on exactly the wrong part of it, so I can only work on it for maybe five more minutes or so before I get to the part underneath his furry backside. I got particularly frustrated with him yesterday (yes, can you believe it, all that lovely sunshine and warmth outside and I was curled up on the sofa working on my blanket!), as I was so close to finishing the final round, and he plonked himself down on the one tiny part that hadn't been finished.

See that? That's the final corner. Do you think he wanted to move?

See! He sat exactly on the part where the rounds join!
He's so cute though, I can't bring myself to forcibly remove him.


I just cuddled him until he got fed up of being disturbed; he moved further down the sofa and I was able to rescue my corner and get on with finishing the last round.

Please excuse the mess, I did a lot of shredding last weekend
and hadn't quite got round to hoovering up. I've done it now.
So it's gone from being big enough to cover the small two seater sofa, and now almost covers the somewhat larger three seater sofa. Definitely wide enough along the short edge, but I can't decide if it's long edges are long enough. Should have started with a longer chain in the middle, I reckon. As it is, if I want to extend it I'll need to do granny stripes on each end as I don't really want it to get any wider. But for now, I'll be happy to just weave in my ends and have it useable at last without a hook and a ball of yarn dangling off it!

I took it upstairs to lay out on the bed, so I could measure it. It's 55" x 72" as it stands. I think I'll have to test drive it on the sofa, to see if we all fit under/on it at the same time. It may need to be a bit longer to accommodate the cat curling up on it inbetween us and leaving us both enough blanket to be warm and snuggled underneath!

Saturday 9 April 2011

Step back in time - Elvetham Hall, Hampshire

I did mention earlier in the week, that on Thursday evening I was off to Elvetham Hall in Hampshire for a work meal/evening do. Elvetham Hall was a secondary home to the Seymour family (most notable for producing Jane Seymour, third wife of Henry VIII of England), who held a number of noble titles including Duke of Somerset and Earl of Hertford. When I realised this was where we were going for our meal, I was far more excited about the location, than the meal itself!

I took the day off on Friday, so I could take my time over having a look around in daylight, as there wouldn't be much time available in the evening before sunset. I didn't know much about the place beforehand. It was rebuilt in the late 1800s, after the original house burned down in 1860. But the most exciting fact I learned was that Queen Elizabeth I had visited the Earl of Hereford at Elvetham in 1591, and had planted an oak tree in the grounds, which still stands today.

I had hoped for good weather, but I was absolutely spoiled. It was gloriously sunny on both days.

Elvetham Hotel
The front of the main house, taken from the entrance to the "Court" building,
where our hotel rooms were located

What really struck me on arriving wasn't the main house, though. It was the medieval church next door.

Elvetham Church
The path you can see on the left is the private entrance for the family.
The commoners would have entered through the lych gate at the back.

You get a real sense of what it must have been like, to be a member of the nobility living on an estate like this, back in those days. I did feel a bit like I was in a Jane Austen novel, especially when I found this bridge.

Bridge
The gate leads to a long avenue of trees, the kind of place I imagine as being
where Mr Darcy presents the letter to Elizabeth Bennett in Pride & Prejudice
There are so many statues and details on the outside of the building. Every time I looked up, I saw something different.
Random statue

Of course, the thing I really wanted to find was Queen Elizabeth's tree. How hard could it be, to spot a 420 year old oak tree? Not that difficult, as it turns out!
Plaque
Found this on the wall at the back of the garden.

Oak Tree
Isn't it amazing! One of the oldest trees I've ever seen.

Inside, the Hall didn't disappoint either! Stained glass windows everywhere (some of them I think were robbed from the church, as it is no longer a functioning place of worship and all the windows are boarded up), wonderful painted wood panel ceilings, and huge, ornately carved stone fireplaces (originals from the Tudor period).
Drawing room ceiling
The drawing room ceiling, decorated with images of Queen Elizabeth I and other
members of the English nobility from the time.

Fireplace
Carved fireplace commemorating Queen Elizabeth's visit in 1591.

The Earl of Hereford
Everything in the house seems geared towards Queen Elizabeth.
This is part of an entire window detailing her visits to
all the main English nobles during her reign.

This is just a small selection of my photos. There are more in this set on Flickr, and even more that I haven't uploaded anywhere yet! I will get around to putting them all on Flickr eventually.

It was really nice to be able to just relax and wander around the place in the sun taking photos. I'm so glad spring is finally here, and we will have days and evenings sunny and warm enough to go out exploring for photo opportunities!
Related Posts Plugin for WordPress, Blogger...