Wednesday 31 October 2012

What's on my WIP shelf today


Wednesday already, so it's time to check out what is currently taking up space on my WIP shelf next to the sofa.


From the left then. The big green and purple blob is my half finished monster, Dave. Most of the knitting is done, all that's left is the spines in the horrendous sparkly silver yarn you can just see on the far right. I am not looking forward to knitting with that! It's scratchy and horrible. I may yet decide to do them in a different colour. We shall see. I have started assembly; the feet and tail have been attached. Haven't decided what do do for eyes yet, I may raid my felt stash and see what I can come up with.

Underneath Dave is the bright yellow and orange glow of Momijigari. I haven't picked this one up in weeks as the rows are so long now. It's not far from being finished, it just needs that final push.

As you can see, the neatly wound ball of Candy Skein Yummy Worsted indicates that I have frogged Calorimetry and am back on track with my plan to knit a pair of mitts to match my Kool Hat. I've done some calculations, and think I've got a pattern figured out.

My swatch to check the pattern works

Since swatching and drawing up my designs, I haven't done any actual knitting on them yet. I doubt they will take long though, as my Rapunzel Mitts were a very quick knit and I'm using the same basic design.

In front of the Candy Skein, you can see a neat ball of Natural Dye Studio Scheherezade, which I was using for my Cwtch Shawl. I can't show you the shawl itself, as it's been cast off and is waiting blocking.

The grey lump on the right is of course my poor neglected Eleonora. It has now been so long since I started picking up the stitches on the border that I'm now thinking I'll rip out the ones I have done and start over, just so I don't have to re-count the stitches already on the needles!

Delicately balanced on top, you will see my latest new project. My new needles arrived on Monday (I only ordered them on Friday night!) which meant I could cast on for the Hot Water Platypus! Very excited to be getting this project underway.

Head over to Tami's to see more WIP updates today!

Tuesday 30 October 2012

Ellie the Elephant

Back at the start of September, I announced the giveaway winners for my most recent blogging milestone giveaway. I was really, really pleased to pull Renee's name out of the hat as it meant I got to make a present for her adorable Little Man.

Renee's son features quite heavily in her blog posts, and he has to be the cutest kid I have ever seen. Seriously, you should go check him out, especially the photos of him in a tux on the cruise ship. Such a cheeky smile!

I decided to use up some of the fantastic cotton stash I got from Kate when she was getting rid of her blanket leftovers, and crochet up a cute stuffed toy I'd been wanting to hook for ages. The pattern was in a crochet pattern collection I bought last year; I've been holding out on making it until I had nice yarn to do it with, as I didn't fancy using my fall back dk acrylics for this one.

The pattern photos have one blue and one pink elephant, but I didn't want to be so gender-specific in my colour choices. I found four colours that went together really well, settling on yellows and greens with a bit of pale blue thrown in for contrast.


Project Notes
Pattern: Noodle the Elephant by Irene Strange (available for download for $4/approx £2.50)
Yarn: Rico Creative Cotton
Hook: 3.5mm
Additional materials: A circle of fabric, toy stuffing

I had a few mishaps at first through not reading the pattern properly, but soon got the hang of it and on the whole, it worked up quickly. I used pale coloured felt rather than fabric as the pattern suggests, partly because it's all I had and partly because the colour worked really well underneath the yarn I'd chosen.

I was very pleased with the finished elephant, and proudly displayed it on my shelf for a couple of days before packaging it up to send off to America with the Zauberball that was the actual prize (and a bar of chocolate, because I know Renee loves proper, British Cadbury Dairy Milk).

When I got home from the post office, I realised I'd forgotten to take a photo of it!!! I didn't even have a WIP shot to put on Ravelry, I'd completed it so quickly...

A quick messsage to Renee later, and she's very kindly emailed me some snaps to share.


Apparently, it had barely made it out of the parcel before Little Man got his hands on it, and claimed it for his own. He calls it "Ellie" (his way of saying elephant) so that is what I have named my project on Ravelry!

I'm so glad Little Man loved his present! And thanks again to Renee for sharing the photos (snapped quickly with her phone, in a brief moment when she was able to get it away from her son!).

Monday 29 October 2012

Snappy Happy Monday

Bollywood themed work night out

Sketches for Warhammer scenery and base designs

The peacock that tried to steal my chips at Warwick Castle

Statue of Lady Godiva in Coventry

Toad in the Hole! As half a Yorkshirewoman I am rather proud
of my ability to make perfect Yorkshire puddings every time.

Sunday 28 October 2012

Year of Projects update - 28th October


I really thought I might have a finished object for you this week, which would make three weeks in a row with a finish! I picked my Cwtch Shawl back up this week and flew through the heart border.


I took it with me to roleplaying night, and made a start on the edging. I have six rows left, that's all. But when I sat down on Friday evening to do some knitting, I suddenly felt the urge to cast on something new. Looking through my list of stash yarns I haven't used yet, I pulled out my Rowan Fine Tweed and decided to swatch for Peerie Flooers. The pattern calls for 3mm needles, but I only have 4mm circs. I tried it on those, but was coming out with the wrong stitch count. I went down to 3mm (using my dpns) and hit gauge perfectly. So a pair of 40cm 3mm circular needles have been ordered!

Back to the list I went, and realised that I now had yarns in my stash that I want to use up that weren't included on the original list. I've now updated it, to include the leftovers of the sofa bed afghan.


I already had two projects lined up for this. The brown and charcoal are going to be used to make a hot water bottle cover in the shape of a platypus, while the charcoal and natural colours will be used for the fabulous trilobite pattern by the amazing Mimi Hill.

As the weather seems to have raced through autumn in a bid to start winter early (seriously, it snowed in York on Friday!), starting the hot water bottle cover seemed to be a good idea. The pattern calls for 4.5mm needles; again, I only had 4mm or 5mm circs in the right length! I swatched on both, and quickly realised I would only hit gauge if I used 4.5mm! So back online I went, and that needle was ordered as well. I'll be starting that one when the needles arrive early next week.

Somewhat disheartened that neither of those projects could be started that night, I did briefly consider getting the shawl back out and finishing off that border. Of course, that's not what happened!


I cast on the trilobite instead.

Tuesday 23 October 2012

Warhammer Scenery - Rocky Bases

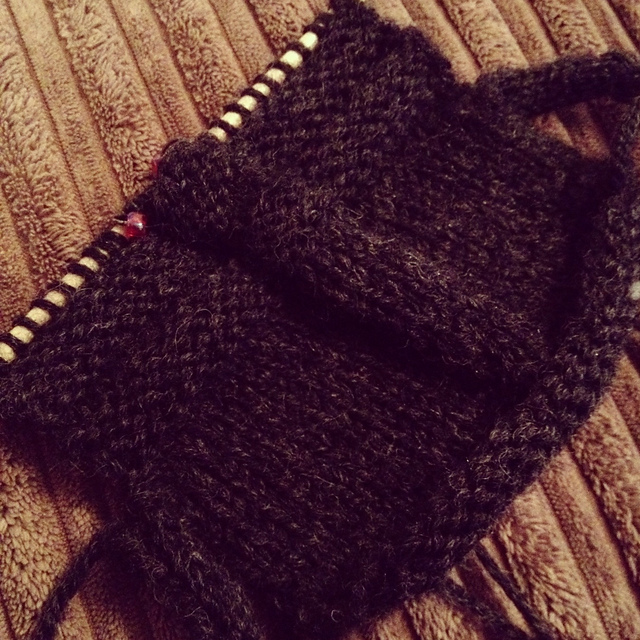
I've not really done much crafting outside of knitting and crocheting for some time now. Not really living up to my self proclaimed title of Master of a Thousand Things! But this past week or two, I've been focusing on a different sort of crafting - making bases and scenery for Jamie's Warhammer 40k models and games. I've been sharing pics of my progress on Instagram (you can find me there as supertinks), but thought I'd share the work here too, as I am quite proud of what I've achieved!

I started out with something simple - bases. Jamie's been on a real drive to finish off his Chaos Space Marine army, but none of the models bases had been painted. This is because Jamie lets me do that, and I hadn't been in the mood for some time. With the army nearing completion, I thought I'd better get started.

Chaos Lord
Taking inspiration from the Chaos Lord model, who comes with a moulded rocky base, we decided to go for a simple rock and sand look, using static grass to artistic effect on each finished base. Having recently got my hands on some proper basing materials, we decided to make suitably impressive bases for the other character models and large models in the army.

Typhus (image from Games Workshop)

Jamie bought the above Typhus model recently, and I thought I'd start with that. The model is an old sculpt, so it's not particularly dynamic. It comes with a plain base, so I took some thin cork sheeting and made him a little rocky platform.


I had to be careful to keep both sides of the platform level, as he's designed to sit flat on the base.


I just tore the cork sheeting into appropriate sizes, and glued it down with a hot glue gun. The stones were added afterwards, using the hot glue gun for the larger ones, and PVA glue for the sand.

Spurred on by the relative ease of building that base, I got out the Helbrute model from the Dark Vengeance box set.

Image from Games Workshop

Another model designed to sit flat on a plain base, although this one is more dynamically posed and has a stone underneath one foot. Whatever I did had to incorporate that stone.


I used the same principles, tearing up cork sheet to build my rock, before adorning the gaps with stones of varying size and gluing sand to the remaining exposed base. The cork was shaped to fit the large feet of the model.

Painting the bases was easy. I just used the same colours I used on the pre-made base above. They were undercoated with the Games Workshop Chaos Black spray, then a heavy drybrush of Adeptus Battlegrey from the Citadel foundation paint range.


After that dried, I highlighted the rock with a drybrush of Astronomican Grey (also from the foundation paint range).


Once that was dry, I turned my attention to the sand. This is the most ridiculous part of painting Games Workshop bases, as you stick perfectly reasonable sand onto the base, then paint it to look more like sand. If you don't paint it, it doesn't look real compared to the rest of the model!

The sand is first painted with Khemri Brown (foundation paint).


Then, a wash of Devlan Mud (from the Citadel Wash range).


Once the wash was completely dry, I drybrushed the sand with Dheneb Stone (another foundation paint). When I was done drybrushing, I took some Chaos Black (from the Citadel paint range) and painted the edge of the base.


The final touch is to glue on some static grass in strategic places. I use the grass to hide particularly poor areas of the base, so gaps in the sand material on the base itself, or embarrassing looking areas of the cork, for example where there is a splodge of glue showing.


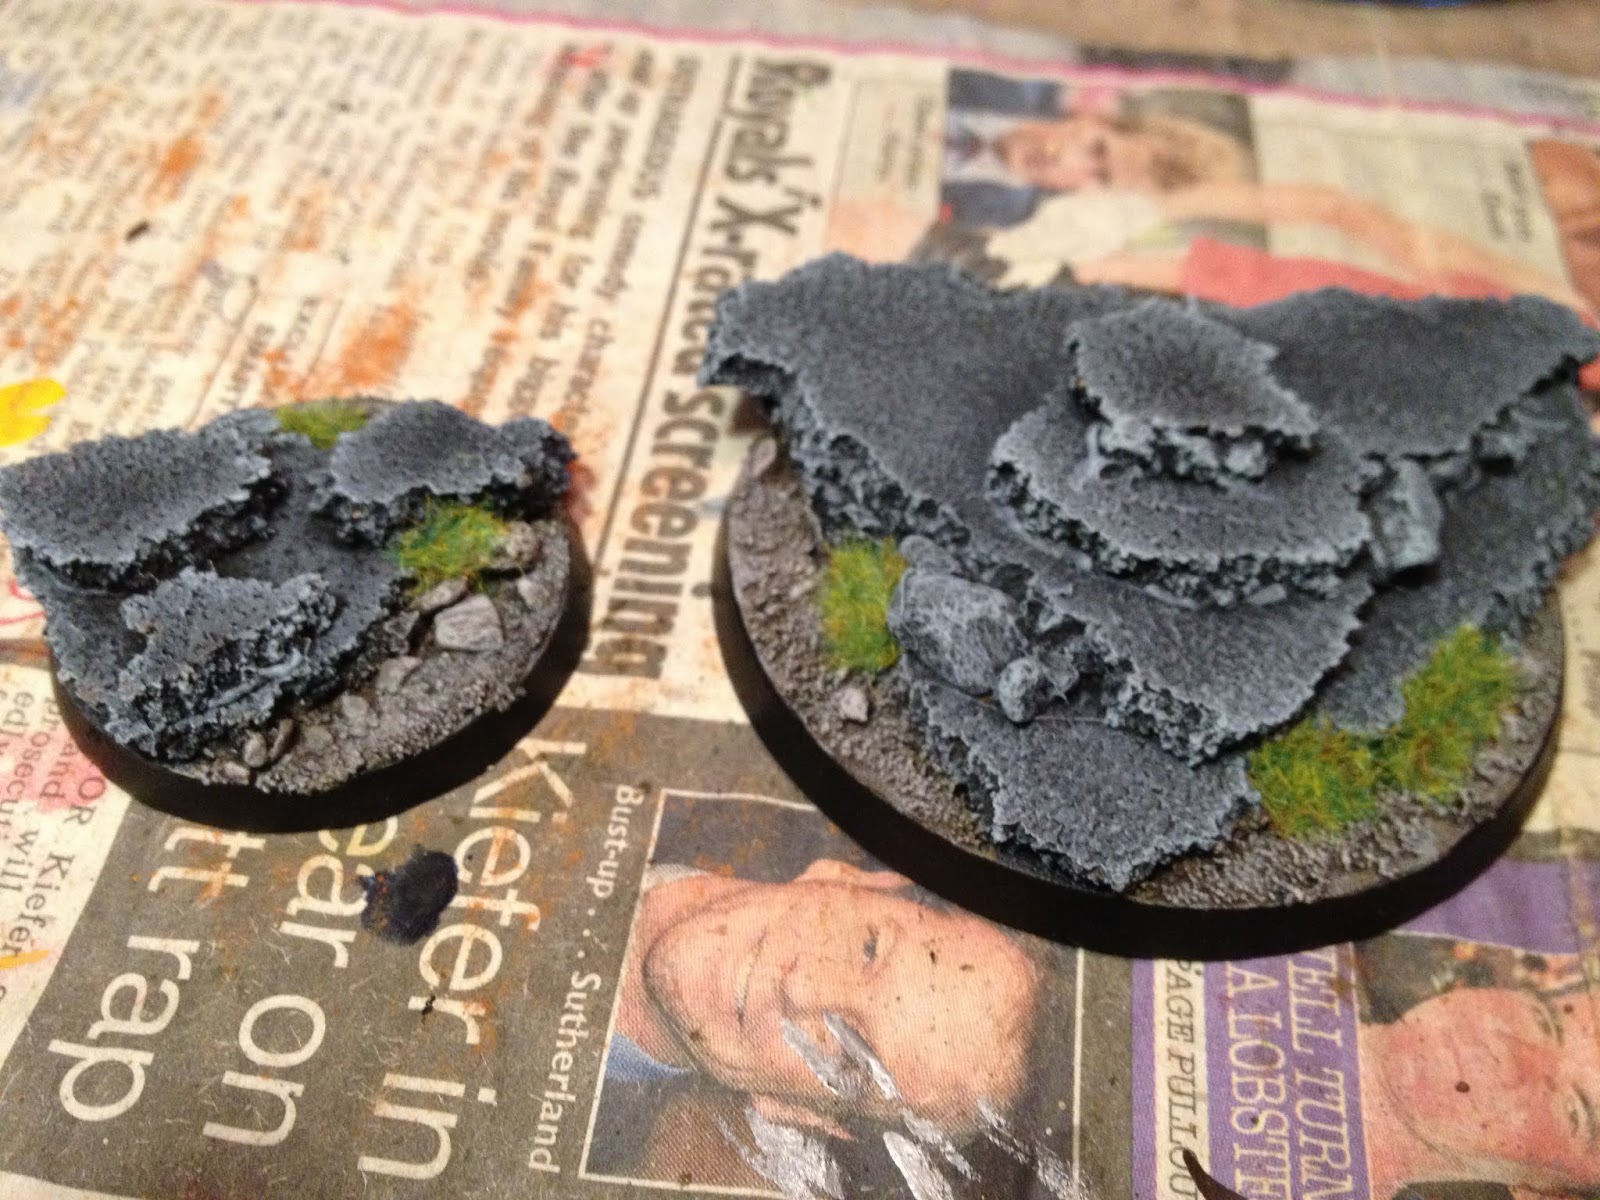
And here are the finished bases with their (still unpainted) models balanced on top:


I am particularly pleased with the way the helbrute sits on his base. Once Jamie has painted the model, and the rock under his left foot has been painted to match the base, it will look seamless.

In order to attach the models to the base when they are done, we will drill into their feet and insert metal pins, which will push easily into the cork and provide a more stable attachment than simply gluing them down.

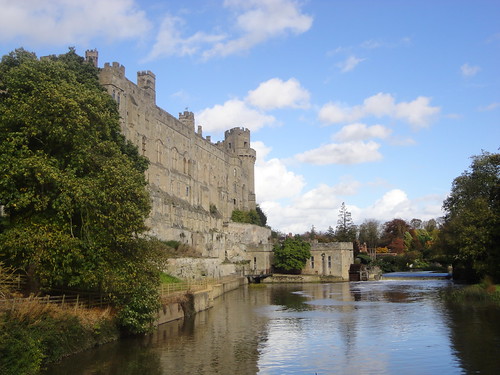
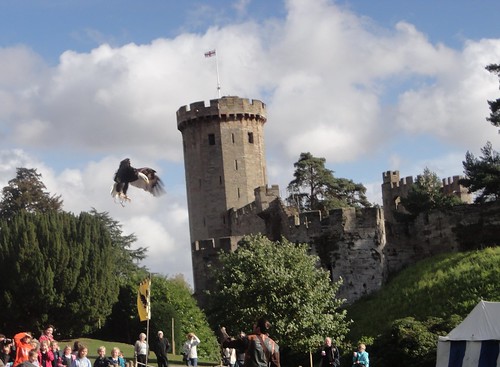
Following the success of these bases, I have turned my attention to more exciting bases, such as the bases for the flying models, and building proper battlefield scenery pieces. These are still works in progress, but I will be back with step by step guides to how I put those together once they are done!

Monday 22 October 2012

Adventures Ooop North

It's been a while since our last adventure, but on Thursday last week Jamie and I took advantage of cheap tickets and visited Warwick Castle.

Warwick Castle

We'd not been there before, so it's another English castle crossed off the list! I wasn't sure what to expect, now that the castle is owned by the Merlin Entertainment people (who also own Alton Towers, Madame Tussaudes etc). It turned out to be an interesting mix of actually interesting historical stuff, and entertaining aimed-at-children attractions.

Warwick Castle panorama
Click through to embiggen
I did enjoy walking the walls and towers, although the hundreds of steps we had to climb were a bit of a struggle at times!

Warwick Castle

We were also massively lucky with the weather. Clear blue skies, with a rather stiff wind. The wind was good, because it meant we got to really see a good show when we stopped off to watch the Flight of the Eagles display.

Archie comes in to land
Archie the Bald Eagle comes in to land on his trainer's wrist

Ernie the Milky Eagle Owl
Ernie the baby Milky Eagle Owl, demonstrating his hunting technique (badly)

Nikita the Stellar's Sea Eagle
Nikita the Stellar's Sea Eagle. Gorgeous bird, I am sad we didn't get to see her fly
Highlight of the day, though, had to be the firing of the trebuchet. Warwick Castle has the largest working siege engine in the world, and twice a day they fire a flaming missile from it to demonstrate how it works. I filmed the whole thing, from the moment they started to wind the arm down. If you just want to see it fire, skip ahead to about 8 mins.


The next morning we had a bit of time to kill before driving even further north, so we stopped off in Coventry to see the Cathedral and a dinosaur exhibition in the museum. We also found this beautiful 16th century almshouse as we were walking into the town centre.

Ford's Hospital, Coventry

The dinosaur exhibition was a little disappointing, but we did get to play with an animatronic Utahraptor that was used when filming Walking with Dinosaurs, so that was pretty cool.

I'd love to show you the final exciting part of our tour up north, as on Saturday I went wedding dress shopping! I hadn't intended to buy my dress there and then, as it was meant to be a fact finding trip with some of my friends who would miss out on the real dress shopping that would have taken place here with my bridesmaids. What I hadn't counted on was finding not just one, but two beautiful dresses, and making a snap decision to buy one of them because the price was so good, I got 10% off and had to order straight away to give myself time for the dress to be made and shipped over from Australia! It's by the designer Jean Fox and I am so excited to have bought my dress already! I am now searching for the perfect yarn to knit a shrug to wear with it.

Sunday 21 October 2012

Year of Projects Update 21st October


Another week, another finish! I'm on a roll at the moment.

Candy Skein Yummy Worsted in Blueberry Cheesecake

This gorgeous skein of Candy Skein Yummy Worsted has been sitting in my stash since February this year. I bought it specifically for Koolhaas, and the colour was chosen by my fiance, who has an excellent eye for things that will suit me.


I cast on about a month ago, as all my other WIPs were too big to take with me to roleplay night. It started off fairly quickly, but took a bit of a back seat while I finished off the sofa bed afghan (still need to weave in those ends on that one!).

This past week, I have picked it back up again and made a concerted effort to finish it.


It doesn't look like much when it's not being worn, as the cables all contract and squish together. As a result, I wasn't entirely convinced by it as I was knitting, although having seen enough pictures of the finished article, I knew the end result would be worth it.

See! Perfect colour choice from Jamie, it matches my eyes!

I love it! So warm and cosy. I think this is going to become my favourite hat for those really cold days in winter, when you want a hat that properly hugs your head and keeps you warm.

Project: Kool Hat
Pattern: Koolhaas by Jared Flood
Needles: 4mm circs for ribbing, 5mm circs and dpns for hat, plus cable needle
Yarn: Candy Skein Yummy Worsted in Blueberry Cheesecake (used just under 125 yards)

I chose to do 4 pattern repeats, which is the directions for the woman's size. While skeptical at first that the gauge of 16 inches for the cast on would be way too small, I was reassured by the many comments about this patterns negative ease, and can happily state that yes, it is more than big enough for even my large (23") head. While Koolhaas is a paid for pattern (currently costs $4.50 to download), I was lucky enough to take advantage of a special offer at Interweave Knits, and pick up an entire pattern book for ten cents (about 7p). The main reason I did it (other than the fantastic bargain of all those patterns for just 7p) was that Koolhaas was included in the book. So glad I took advantage of that offer, because I love this hat already. Mind you, it's so fabulous, I'd have happily paid $4.50 for it!

Could do with being better written though; I had to frog back my first few rounds of the crown decrease because I mistakenly read k2tbl to mean k2togtbl, so decreased too many stitches in the first round!

I have enough yarn left over (95 yards) to make a pair of mitts to match, although I can't currently settle on a pattern. I may make one up, taking inspiration from this pattern (ironically, devised in order to use up yarn left over from knitting Koolhaas!) but incorporating the lattice pattern from the hat on the back of the glove. We'll see how that goes. For now, I will work on other things and pick up the yarn again when I am in the mood.

Wednesday 17 October 2012

Wip update


It's Wednesday, which means I'm linking up with Tami again to share what is currently on my needles.

The shelf of abandoned WIPs

Momijigari, Cwtch Shawl and Eleonora have spent another week languishing on the shelf. I just haven't been interested in tackling those long rows of knitting. I wanted quicker fixes this week.


This is Calorimetry. I needed something to use up the remaining yarn from my Koolhaas hat and initially thought a pair of mitts to match would be a good idea. I looked around on Ravelry, tried out a few patterns (both knit and crochet) but didn't feel happy with anything. So I widened my search to any accessory in worsted weight yarn under 95 yards. I found this pattern, thought I'd give it a go.

I had misgivings from the start, but wanted to finish it before deciding if it was right or not. The pattern comments. One row from completionI transferred it to my long circular from the straights in order to try it on. I don't like it. It sits funnily on my head, and doesn't look right. So this is heading for the frog pond, and I will divide my yarn into two equal sized balls and make some mitts once I get my mitt-knitting mojo back.

Wand'ring Lonely

After a brief resurgence, I'm afraid this filet crochet panel is headed back into hibernation. I did about another ten rows, and then discovered that somehow, somewhere I had gone wrong. I am currently cross with it, so don't have the patience to lay it out and find out where the mistake is. Hopefully it's only in the most recent couple of rows, so frogging back and fixing it won't be a huge pain. But not one I'm keen to sort out now. Back into the bag it goes!


In a fit of startitis, this morning I cast on a project from the current issue of Lets Knit magazine. I don't normally buy knitting magazines, but my eye was caught by the gorgeous green and purple yarn in this month's kit, and by two of the patterns included in the issue. The kit yarn is being turned into a monster, and I've also fallen in love with one of the hat patterns included in the magazine.

Don't expect much progress from me this week coming though - today is all about a different sort of crafting, and I'm away until the weekend. Will be back on Sunday with my YoP update. See you then!

Tuesday 16 October 2012

Christmas comes early.

A couple of weeks ago, Sarah over at Crafts from the Cwtch started a series of posts about Christmas gifts. In her first post in the series, she talks about two craft books inspired by two of my favourite literary classics: The Wizard of Oz and Alice's Adventures in Wonderland.

As soon as I read her post, I knew I had to own these books. So I hopped over to Amazon and added them to my wish list. Imagine my surprise, when a few days later, one of them dropped through the letterbox! I'd entered my wishlist in a Christmas RAK last week, so wasn't totally surprised to see an Amazon parcel on the doormat when I hadn't ordered anything!

Everything Alice: the Wonderland Book of Makes

I've had a quick flick through, and have already found lots of things I now desperately want to make.

This rabbit would make a great gift for our niece

Lavender doormice - but I want to make them with catnip!

Wonderland themed decorations for the Christmas tree?

I've wanted to make teacup candles for ages

Love the queen of hearts apron in the middle.

I can't wait to get stuck in. I'm also finding myself now desperate to host a Wonderland themed tea party, just to give me an excuse to do more of the projects in the book!


Related Posts Plugin for WordPress, Blogger...